Untitled-3.jpg

Blog

Porch Makeover

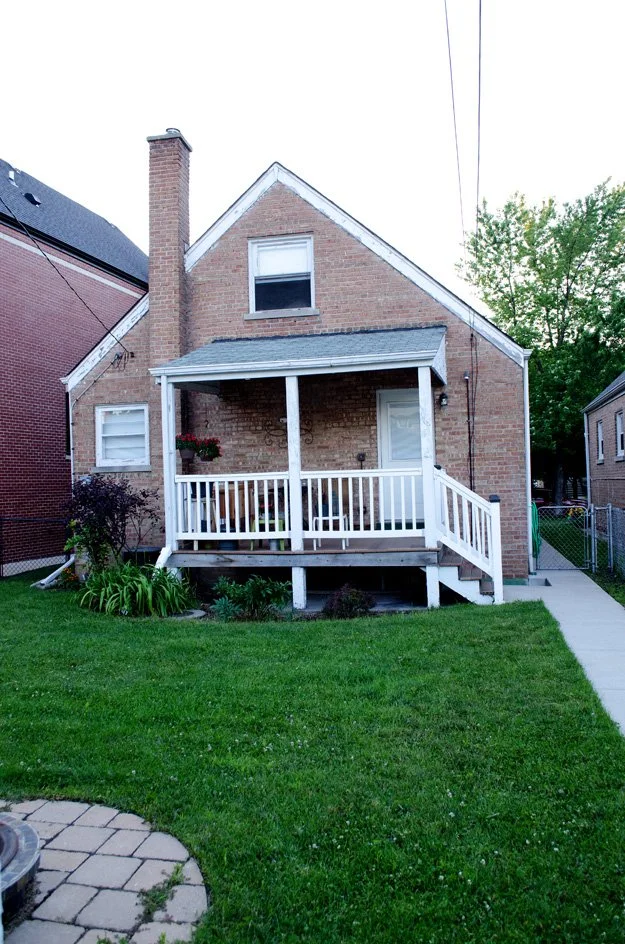
Our back porch has been pretty neglected since we moved into our house last year. When we moved in, I just placed an old table and chairs on the back porch and threw some pillows I already had on the chair. I knew I wanted my back porch to look nice, but I didn’t have the time or energy to put into it since my main focus was the inside of my house. Now that the inside of my house is coming along (and Summer is here again), my goal is to turn my back porch into a getaway that feels like an outdoor living room.

For starters, I knew I wanted to get rid of the small table I had and get a couch instead. When I was at my parent’s house, I fell in love with their outdoor couch. My super cratfy mom added some DIY pillows to her couch, which made it so incredibly comfy! So, I went online at Target and ordered my love seat. I already had the chairs from my old apartment, which were perfect because they were also wicker. I did a little rearranging and replaced the wicker chairs with my love seat. I also had an outdoor rug I had bought from Ikea last year that I was not loving this year and knew I needed one that had a little more color to it. After I rearranged my furniture I really wanted to include a coffee table in the middle of my chairs and couch. When I was alley trolling one day (imagine that, me cruising an alley!), I came across an old crate that did not have a bottom to it, which made it look like a coffee table! I grab the crate and threw it into my car – a DIY makeover coming soon!

When Mike and discussed the decor for the porch last year, he kept asking for a Chicago flag pallet wall hanging. I kept blowing off the idea because he wanted to buy one (which we all knew would never happen). If we were going to have a pallet flag, we were going to make it! I did not have the time last year to focus on making a pallet flag, but I do have the time now. So, I let the Chicago flag pallet drive the decor for my back porch. I embraced the color red along with a light blue.

When I was at Hobby Lobby a month ago I found the most gorgeous fabric EVER! It basically had all of my favorite colors in it, including the red and blue I was going with for the flag pallet! I also lucked out because Hobby Lobby had a pillow cover in the perfect red color and a cool design that I fell in love with. I bought both of them to start my porch transformation.  See my pillows below. You can see my tutorial on how to make your own pillows here.

I have more porch projects coming your way…stay tuned!

meghan quinonesComment
A Clean House

This June will be our “New House” one year anniversary. Crazy, right? Having moved into our house in the Summer, this is officially our first Spring here. With Spring comes flowers, showers, my birthday, and good ol’ Spring cleaning! I can honestly say I have never followed the Spring cleaning checklist. I decided this year would be different.

It’s so funny how my view towards my living space has changed since I became a homeowner.  I take so much more pride in what my home looks like. I mean, it is the biggest purchase Mike and I  have ever made. We really should be treating it like a museum. The first stop in making our house a happy home was to make sure it was clean, Spring clean!

To help with the overall cleaning process, I enlisted a little help from HOMEJOY If you are not familiar with HOMEJOY, they are a website platform that connects clients with cleaning professional in their area.  At HOMEJOY, every cleaning professional is screened, background checked, and must maintain stellar ongoing customer reviews. This is HUGE, especially since you are welcoming this person into your home.

meghan quinonesComment
How to Create a Gallery Wall

When we moved into our new house I knew I wanted to try my hand at the gallery wall idea I had seen all over Pinterest. I love that there are so many different ways you can design a gallery wall. I ended up going with a more uniform design. I thought this design format would work better than the more scattered look I have seen.

To start my gallery wall, I traced all of the picture frames I was going to use onto white paper. I marked on the paper where the actual hook thingy was so I could easily find where I needed to hammer in my nail. Then, I arranged my pieces of paper on my wall, using painters tape to hold them up. There was measuring

involved, which is the bane of my existence! No matter how many times I measured and used my laser level, one of the pictures was always off! After a bit of a struggle, it was perfect (sort of).

After the papers were up, I enlisted Mike’s help with the hammering. He is much better at this task than I am! 

Instead of purchasing photographs, I decided to take my own. That’s right, this girl doesn’t pay for artwork, she creates her own! For my larger pictures, I took some photos around Chicago (along with some help from Mike). This photo below is of the Flatiron Building Bucktown. This was right around the corner of our old apartment.

The smaller column of photos on my gallery wall are actually pencil drawings by my mom! She is insanely talented and did pencil drawings of the apartments mike and I lived in before we bought our house. The apartment below is from when Mike lived in Roscoe Village.

meghan quinonesComment
How to Use Modge Podge With Fabric

Long time, no post! I figured it has been WAY too long since my last post. Time sure flies when you are busy and having fun!

I actually completed this project quite some time back. It has just taken me forever to edit the pictures and post them! Back in late Summer, I was looking through an HGTV magazine and they had written an article on how adding a tray to your kitchen can totally make all of your counter-top items look like they’ve been organized by a professional. Of course, I was all about this concept. Anything that was going to make my clutter look more organized and in turn, make me look like a genius, I was all game! 

I was at my local Home Goods cruising the sale section when I came across a decent sized tray. It was an off white tray with purple detail on it (not really my style). I flipped it over to take a look at the price. It was on sale for $15, originally marked as $100. Now, $15 would typically be more than I would spend on something like this, but since it was clearly something fancy (and a good size), I committed to it and went ahead and bought it.

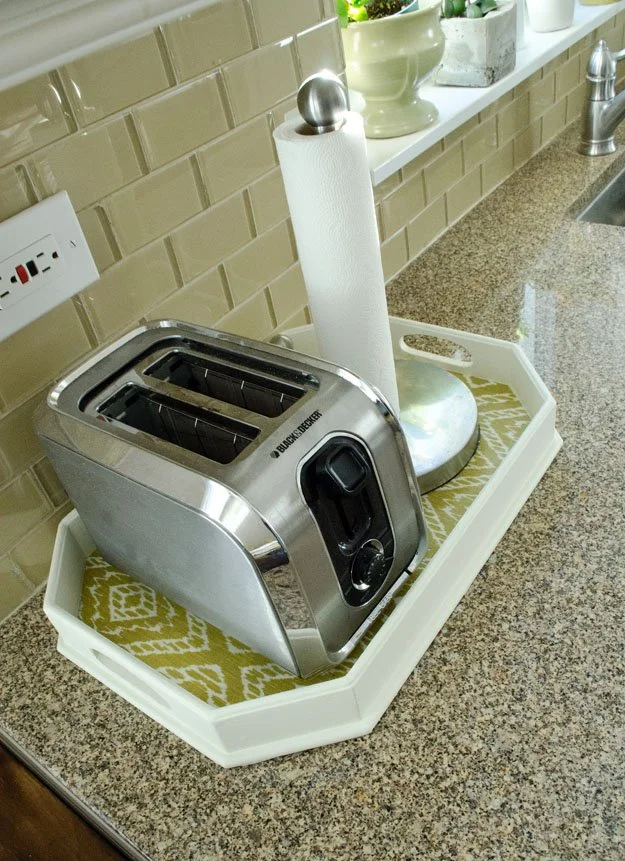
I was able to find a fabric print that matched the color of my kitchen chairs, which was awesome! I knew I wanted to add this print inside of my tray so I could carry the color of my chairs throughout my kitchen. This DIY was super easy to complete!  Here’s how I did it…

Supplies:

– Tray

– Fabric

– Fabric Mod Podge

– Paint Brush

– Paint

– Scissors

– Pencil

Step 1: Paint the outside of your tray. I also painted a little bit of the inside of the tray.

Step 2: Lay your tray on top of your fabric. Use your pencil to trace around the bottom of your tray. Then, cut out what you just traced.

Step 3: Put a generous layer of Fabric Mod Podge on your tray. Then, lay your fabric over the Mod Podge.  Press down and smooth out your fabric.

Step 4: Put a layer of Mod Podge over your fabric. This will provide a nice seal over your fabric. Let the glue dry.

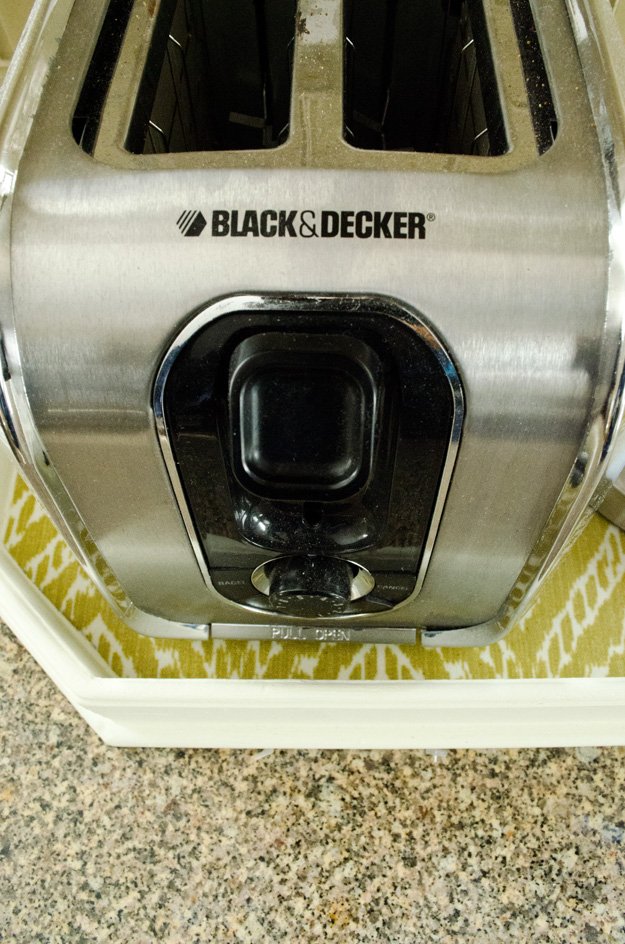
Step 5: Once your glue is dry, add your kitchen gadgets. My tray fit my toaster and paper towel holder perfectly!

meghan quinonesComment
How to Refinish Furniture

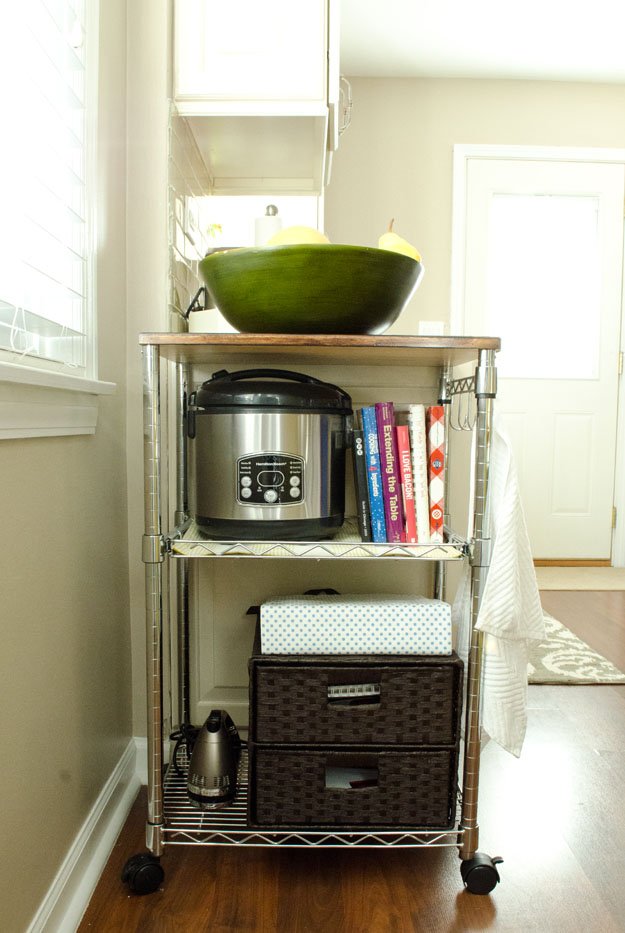
My in-laws used to have this little kitchen cart in their basement and it housed their mixer and microwave. Since they were in the process of moving, they no longer had a need for the cart so they gave it to Mike and I. We were pretty excited about the new addition to our kitchen.  Our kitchen isn’t all that big, but this kitchen cart fit perfectly next to our counter. It’s like it was meant to be!

After I re-did my kitchen table (another in-law hand-me-down), I thought it would be awesome if I could get the top of my kitchen cart to match the top of my table. Since the top of my cart was not all that big, this redo did not take long at all. This was a quick great weekend project. I am so happy with the results. My table and cart now match!

Supplies:

– Kitchen Cart with Wooden Top

– Wood Stain (mine was walnut)

– Varnish

– Rag

– Paint Brush

– Sander and Sandpaper

– Steel Wool

Step 1: Sand the top of your wood, removing any stain or finish.

Step 2:  Use you paint brush to paint vanish on top of your wood. After 15 minutes, use your rag to whip the stain off.

Step 3: Keep repeating Step 2 until you have your desired stain intensity.

Step 4: After you stain is completely dry, add a coat of varnish to your wood. Let it dry at least 12 hours. Once it is completely dry, rub your steel wool over the entire surface. Repeat this step 2 more times, except the third time, don’t use the steel wool.

meghan quinonesComment
How to Make a Pillow

I have been in full “decorate the front room” mode for what feels like FOREVER! I thought I had landed on a color scheme, but in true Meghan “fashion”, I went in another direction. I ended up changing directions when I came across (what I like to call) an  inspiration pillow. This pillow was navy with mint, lilac, and a very light champagne color. Normally I would not be down with purple, but I just loved how all of the colors came together!

I was able to find a couple of solid mint pillows, which I scooped up from Marshall’s for a cool $10 a piece! I knew I wanted another pattern, but was having a hard time finding anything in stores and online.  One day while perusing the home decor fabric at Joann’s, I saw that they are now featuring fabric by Nate Berkus. Umm, when did this happen??? Either way, I was super excited to see the design aesthetic of Nate Berkus in fabric form!

There were two patterns I was eyeing. One was a black and white geometric stripped pattern, and other was an animal print/ikat design in navy. I really liked the geometric pattern, but my heart was fluttering over the navy ikat. I grabbed a half yard of the ikat and created my own Nate Berkus pillow for about $5.00. SCORE!

  Supplies:

– 1/2 Yard Nate Berkus Fabric

– 6 X 12 Pillow Form

– Scissors

– Sewing Machine

– Yarn (I initially thought I was going to add tassels, but decided against it)

– Straight pins


Step 1: Fold your fabric in half. Lay your pillow form over your fabric. Cut a 1/4 inch around your pillow. Place your two pieces of fabric together so the patterned sides are facing each other and pin them.


Step 2: Start sewing around your pillow. Start at the bottom left hand side. Leave an  1/8 inch seam allowance. Sew around your pillow until you get to the bottom of your right side. Turn your pillow right side out and add your pillow form. Fold under the open ends of your pillow and pin (this will give you a nice finished edge). Then, sew the bottom of your pillow.

meghan quinonesComment
How to Refinish a Kitchen Table

I have been busy, busy, busy around our new house! From trying to organize all of our belonging, to painting the crap out of anything and everything that has a surface!

Speaking of painting, I have found a new obsession that is Chalk Paint. Not the kind you buy, but the kind you make yourself (obviously!). This stuff is pretty much magical. It allows you to paint wood furniture without sanding it. Oh, and the best part is, if you end up hating the color you picked (guilty as charged) you can paint right over it without any sort of sanding! Can you see why I am obsessed?!?

First up, for my chalk paint experiment, was a lovely oak kitchen table that fits perfectly in my kitchen (Thanks Beth & Tony for the donation! :D) . I loved the oak color, but thought my kitchen could use a little pop of color. I found a fabric swatch that had a pretty Chartreuse color on it that I thought would work well in my kitchen. So, I took the swatch to Home Depot and had them color match it. The color was spot-on! I was thinking of painting my chairs AND my table this color but decided against doing the table. I didn’t want to give anyone a stroke from the intense Chartreuse color! So…I decided to refinish the top of my table and paint the base an off-white color.

I took pictures of my table before it underwent its transformation, but I recently got a new phone and lost the pictures. With the help of Google, I was able to find an image that looked identical to my table before I redid it.  This was my first time ever painting and refinishing furniture. Thanks to my mom, Marcia, for walking me through the process! It took some patience (which I rarely have), but I am super happy with the outcome of my project. I now have a ton of other projects that involve chalk paint-no surface is safe!

Have you ever used chalk paint? Did you have a positive experience with it?

Supplies Needed For Chalk Paint:

– Semi Gloss Paint

– Plaster of Paris

– Tablespoon

– Plastic cup

– Plastic Spoon

– Water

Supplies Needed to Refinish the Top of Your Table:

– Wood Stain

– Paint Brush

– Varnish

– Furniture Wax

– Steel Wool

– Sander and Sandpaper

– Rags

– Plastic Gloves

To  Paint your chairs and bottom of your table:

Step 1: Wipe down all of the areas you are going to paint to remove any dirt or dust.

Step 2: I used the Chalk Paint instructions from this video, and they worked like a charm!

Step 3: I did 2 coats of paint on both the base of table and all of my chairs. Once everything is dry, you are going to go over your table base and chairs with your finishing wax. After you let it set for a few minutes, wipe it off with a rag (this will help protect your furniture). I also added new felt floor protector pads to the bottom of my chairs.

Step 1: To refinish your table, you will start with sanding it down. After you have sanded it down and it is nice and smooth, wipe it down with a wet rag to remove an dust.

Step 2: Start painting on your stain. Paint it on, then wipe it off. I ended up doing about 5 coats of stain to get my desired color.

Step 3: Once your stain has dried, take your varnish and brush on a think layer. Let this dry close to 24 hours. Once it is COMPLETELY dry, rub steel wool all over your table getting it nice and smooth. Apply another coat of vanish. I did four coats of varnish. The last coat, I did not use my steel wool. I left it nice and shiny.

meghan quinonesComment
How to Paint a Front Door

So, I did it. I committed. I picked a red and went with it.

It was really hard trying to decide which color to go with for my front door. I really wanted yellow or blue, but ended up going with the color I always wanted, which was red. I am very happy with my choice. I think the red color looks really nice with my yellowish brick.

Now, I really did not want to post the end result yet, but people have been asking me which color I went with. You see, the front door looks like S*it. We are getting a new front door that is full glass, so you will be able to see the pretty door behind it, Oh, and we will not be putting sticky numbers to the front of our new door. We will be grown-ups, and will add some sort of metal number set to our actual house. ;)

I have to admit, my mind is already thinking of Fall/Winter wreaths to hang on my new red door. 

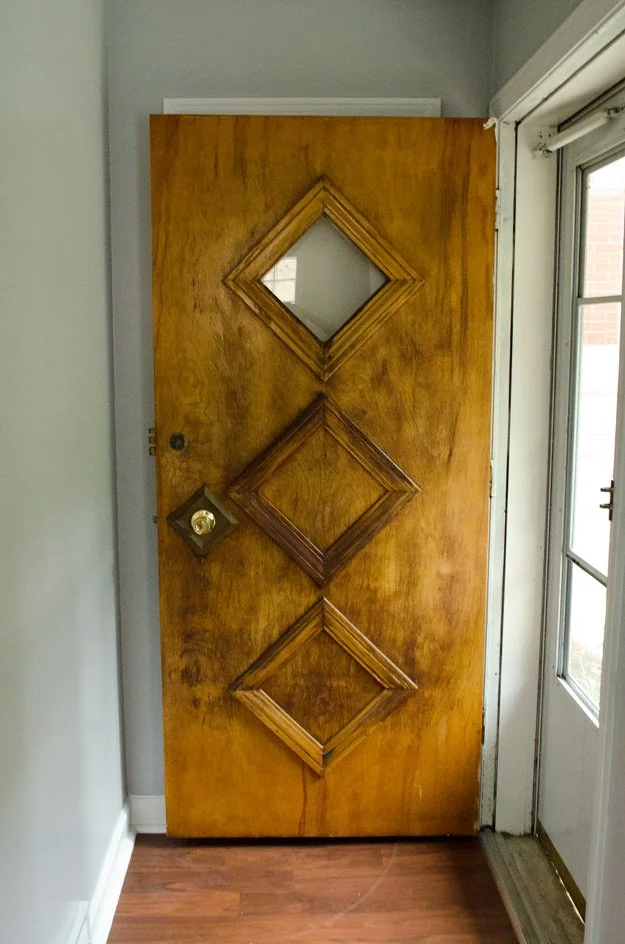
This is my door before the paint job. It screams 1970’s! The triangle front door is very popular in my new ‘hood. The triangles definitely give the door character, but I think the paint modernized the design a bit.


First, I sanded down the front of my door, really roughing it up so the paint would adhere.


Then, I taped off all of my hardware and around my window.


Finally, on to painting! I did about 4 coats of paint. I figured I would keep going so it had a nice thick layer and since I had the paint to do it!


Viola! My new front door. I still need to rub it with a wax to finish it off, but I think it looks pretty good. The lighting was pretty bad when I took this picture, which is why it looks a little maroon. Trust me, it is a nice bright red! And once again, the yucky door in front of it shadows it as well. Don’t worry, you will see more of my red door. Mike and I have been busy working on the inside (as well as the outside) of our new house. There will be more pictures to share of the outside (that will include the red door!)


meghan quinonesComment
One Year of Living My Dream

(Photo Credit: MISSWALLFLOWER)

I just realized the other day that I have been working at Blitsy for a year now! Holy moly! Where the heck has the time gone?

It is hard to believe it has been over a year since I decided to take the leap and pursue my passion of crafting and creating. If you would have told me 10 years ago, heck even 2 years ago that I would be doing what I love for a living, I would have laughed at you. I still find myself pausing to pinch myself to see if this is my reality. How in the world did I get so lucky to be spending every day doing what I truly love?

I am always reading my horoscope to see if any of the info relates to what is going on in my life. I saved my horoscope from last June when I was trying to decide what to do about my job situation. Below are snippets from my June 2013 horoscope:

“…you may try your hand on creative writing this year.” I started writing my own blog and started writing the Blitsy Blog.

“…you may get an offer to host a TV show you’ve had in mind, and may make a pilot show to see how your concept translates. You may get media training to be a spokesperson for your company, even if you’ve never been asked to do anything like that before. The idea is that you will branch out to new areas and grow as a result.” I started filming sale sneak peaks and project tutorials for Blitsy, with clearly no prior experience!

“There’s no time to spare – plan to get started in early July.” I started at Blitsy July 15th.

This month you will get the chance to make a quantum leap, but it will be up to you to make it happen. A window is opening – the question is, will you redouble your efforts and make the most of this month’s extraordinary new moon and alignment of Jupiter, or let the moment pass? I made the leap, jumped through the window, and have never looked back!

meghan quinonesComment
Our New House

So, I have clearly been absent lately. I am SO sorry! Mike and I have had a TON going on…

Mike graduated from the Chicago Fire Department Academy (this has been a lifelong dream of his!). While he was in the academy, we started our house hunting search. We had waited for 7 years, yes 7 YEARS to start the home purchasing process. We wanted to make sure he would actually get on the CFD. We figured before we committed to buying a home in Chicago, we would wait to make sure this thing was actually going to happen!

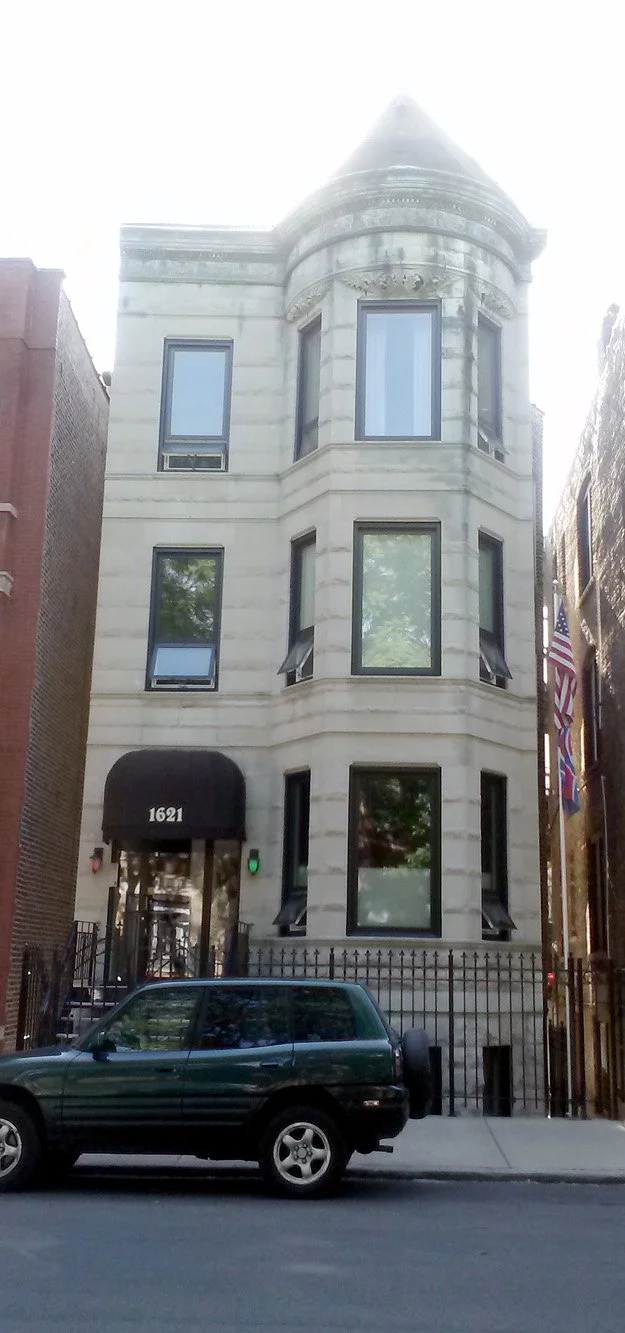
Well, he got on, he graduated, and is now a Fire Fighter! While he was in the academy we started our home search. We would have LOVED to have bought a place in Bucktown, but single family home in Bucktown = $$$$$. So, we ventured a bit north and west. We ended up looking in Edison Park and Norwood Park. Here, the single family homes were a little more affordable than Bucktown.  Our apartment was in a fantastic location with a ton of natural light. However, I wanted space, a yard, a garage, and SPACE! We had outgrown our lovely little apartment in Bucktown and needed more space!We found a few homes in Norwood Park that we liked. There was a jumbo Georgian that we really liked. The space was great, but it needed A LOT of work! I thought we could handle the renovation, so we put in an offer. Thankfully, our offer was not accepted. After going through minor projects with Mike in our new home, it is safe to say we would have killed each other if we had a total rehab situation on our hands! We drove past the house we did not get and turned down a street a block away. This street was filled with trees and a parkway that ran in the middle of the street. It was so charming. Mike said if a house was on the market on this street, he would buy it in a second! Well, as fate would have it, a house went up for sale about a month later!

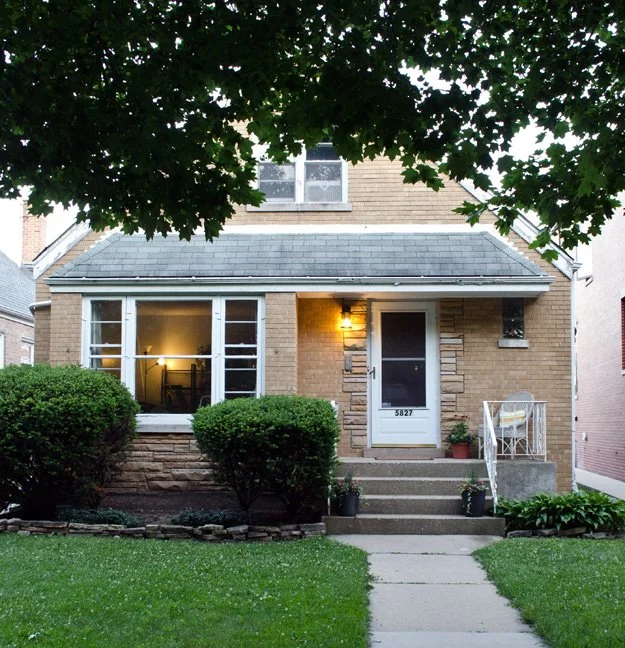
When we looked at our house for the first time, you could tell the outside of it had been neglected. Paint was chipping, the landscape looked overgrown and out of shape. Let’s just say the curb appeal was not totally there. However, when we went it, the house was adorable! The prior owners had redone most of the house. They finished the basement so it now has a bedroom, living room, and bathroom. The kitchen had been redone as well as the two bedrooms on the main floor. The bathroom, however, looks right out of a 1970’s Macy catalog! The good news about the bathroom, even though it is dated, it is clean and in good shape. My favorite part of the house is the unfinished attic! The attic runs the whole length of the house and has the potential for more rooms and a bathroom! I love having raw space to work with. Even though most of the house was updated for us, we still have space of our own to work some magic. I keep telling Mike it would make an AMAZING studio space for me. He thinks I am joking. Maybe one of these days I can convince him!

I am ready to get the major to-dos out-of-the-way so I can start decorating and crafting the crap out of my new house! So, stayed tuned for a TON of home DIY projects. I have so many ideas, and so many rooms to DIY the heck out of!

meghan quinonesComment
How to Stencil A Tote Bag

Being an employee at Blitsy, I get access to thousands of products. This is good AND bad. It’s good because I get to shop items that neither Michael’s nor Joann’s have (SCORE!), but it’s bad because all  I want to do is shop!!!

Speaking of shopping, we recently ran these blank shopper totes. If you remember way back when, I did a Trader’s Joe’s Bag Challenge. I did this challenge to start recycling all of the bags from Trader Joe’s I had been collecting. When I saw the shoppers on sale, I grabbed 4 of them. I figured it was about time I got on board with the reusable bag clan and stop my Trader Joe’s bag collection!

The bags were cute the way the were, but since they were blank canvas they begged to be decorated! To make my bags bright and cheery, I used a stencil to paint a cross pattern on all of the bags. I went with punchy colors that screamed Summer!

I somehow misplaced my tutorial pictures (whoops!). So, here is a quick explanation of what I did:

Supplies:

– Shopper Tote

– Stencil

– Fabric Paint

– Pouncer

– Cardboard

{Step 1}: Put your piece of cardboard inside of your shopper to prevent any paint from seeping through to the other side. Place your stencil towards the top of your shopper (I had my stencil overlapping a bit off the edge).

{Step 2}: Begin painting over your stencil, filling in your entire pattern.

{Step 3}: Once you have filled in your entire stencil, move it to the right. You will place your stencil over some of the crosses you already painted to ensure your pattern is straight. Let your paint dry and you are all set. Easy peasy!

meghan quinonesComment
How to Make a Book Cover

I am always on a mission to get organized. No, really! Everyday I tell myself to get organized, I need to write down my “to-dos” for the day so I can stay on track and actually get things done. I figured maybe if I actually had something cute to jot my to-dos down ON, I would actually do it.

The last time I was at Michael’s to grab one item, I ended up spending like $40.00 (don’t tell Mike!)! That’s what happens when I allow myself to wander all of the aisles at the craft store; I get inspired to create 10 more projects! One of my purchases was this cute journaling card that had the word “hello” cut out of it. Now, I didn’t need this, but I WANTED it! So, I scooped them up and figured I would create some sort of project with them. Well, that project was my one-of-a-kind “to-do” notepad! I made my own paper using my “hello” card as a stencil! Now, time for me to start creating my lists and actually knocking some items off of it!

Supplies:

– Old Book (or an ugly new one ;D)

– 2 Sheets of different colored Cardstock

– “hello” Journaling Card (you could also use a Stencil or Stamp)

– Silver Paint

– Pouncer

– Scissors

– Mod Podge

– Paint Brush

{Step 1}: Lay your journaling card on your paper. Begin to paint over it with your pouncer. Move your card all over your paper stenciling “hello”.

{Step 2}: Cover the back of your book with Mod Podge and lay it on one of your pieces of cardstock.

{Step 3}: Trim down the edges of your paper as well as cut an angle at the corner of your notebook.

{Step 4}: Put Mod Podge on the inside part of your paper and glue it to your book.

{Step 5}: Put Mod Podge on the cover of your book. Lay your designed paper about an inch past your colored paper. Press down.

{Step 6}: Trim your edges again like you did in Step 3 and glue to your book.

{Step 7}: Put a layer of Mod Podge over the front and back covers of your book. Let your glue dry and you are finished!

meghan quinonesComment
How to Arrange Flowers

Mike’s Chicago Fire Department Academy Banquet was last weekend. When the discussion around centerpieces came up, Mike told his team he had someone that could do them for the event. That “someone” was ME! 

So, I dusted off my flower creating hands and enlisted the help of my mom (once again). After I was told that I would be doing all of the centerpieces, I asked Mike how many I would need to create. His response was “45”. My response was “You volunteered me to make 45 centerpieces?!?!?!?!?!?!”. Things have been pretty busy around here lately, so when I heard this number, it immediately brought me back to my wedding and the stress that came along with it! I took a deep breath and started planning.

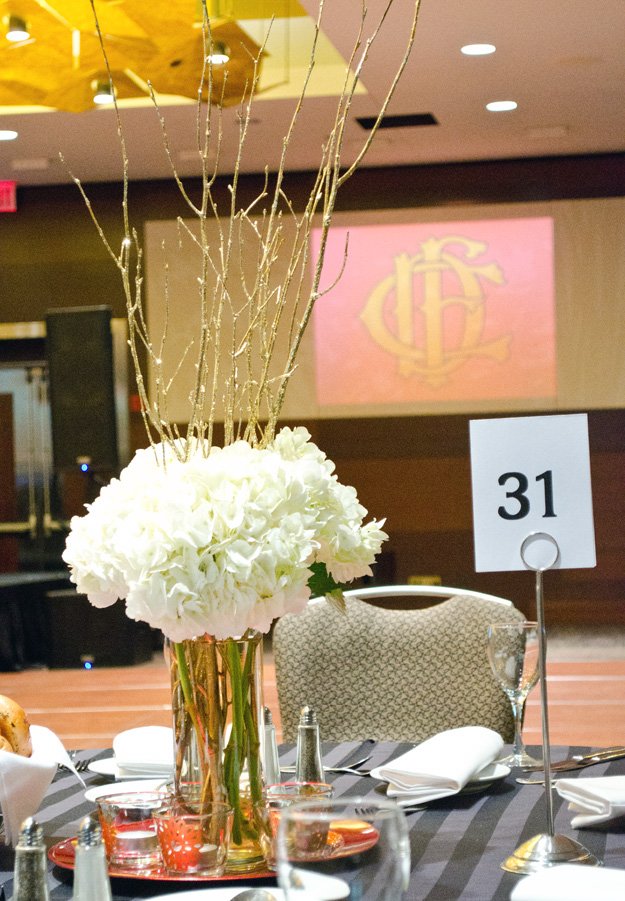
I was told the colors were red, gold and black. I wanted to make sure I incorporated these colors, so I began my search for inspiration. I knew I wanted to keep the arrangements simple for my own sanity, and the sanity of my Mom! I went with tall vases filled with Hydrangeas and gold glittery sticks. I placed the vase on a red charger surrounded by votives with gold decorative circles decals.

When I finally landed on my design, I began to search for the best price for flowers. For my wedding I purchase my flowers from Jewel, which were reasonable until…….I found LW Direct!  Okay, first off, Larry is amazing! He was super quick to get back to me and his prices were exceptional! His location was even more perfect because it was located across the street from my office! Score!

For my vases, I was originally going to purchase all of them through www.saveoncrafts.com. When I saw how much the shipping was going to be for these bad boys, I decided to rethink my purchase. About $300 of my budget was going to go towards shipping! Ummm…I don’t think so! So, I ended up stumbling upon a flower design studio (in my office building!). I know, talk about luck! I was able to rent the vases for WAY cheaper than if I had purchased them. Oh, and Ryan at StemLine Creative was the sweetest! He gave me tips for my flowers and centerpieces, which was so nice!

I used gold branches in my vases and placed the vases on red chargers for extra detail. These red charges and gold glitter branches are similar to the ones I used.  I thought it was a pretty good value for what I got.  Thank God for my mom! She stored the large boxes of branches and charges for me. My tiny little apartment would have been taken over by these boxes! I bought my tealights and votives from Ikea.

When all was said and done, my 45 centerpieces ended up costing $24 and some change a piece. Not bad if I do say so myself!

To assemble my vases, I had my mom cut my branches down about 10 inches.  I cut my flowers so they were just barely above my vase. Each vase had 4 Hydrangeas and 3 branches. My mom took a patterned punch, punched adhesive vinyl, and stuck the decals on to the clear votives. Then, I placed the charger down, added the vase in the center, and placed 5 candles around the vase on the charger. That was it. SUPER simple!

meghan quinonesComment
Quick Vase Update

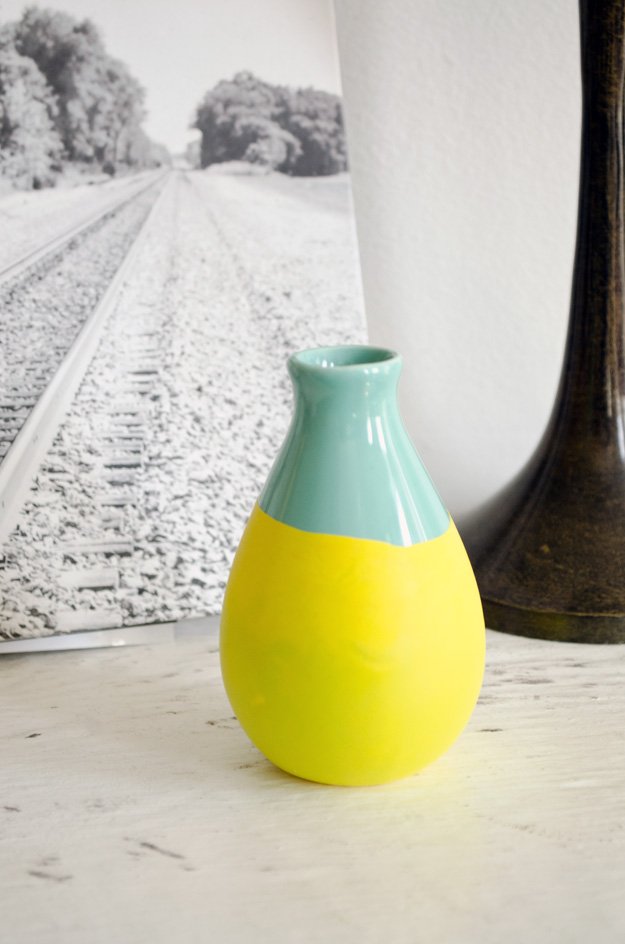
The last time I was at Michael’s I found myself cruising the sale aisle (per usual). While I was perusing, I came across this adorable little turquoise vase. Now, I certainly did not need another vase, but I could not pass it up since it was only $1! 

My little vase has just been sitting on a table collecting dust. I was initially thinking I would add a clay flower to add some extra detail to my vase. I was feeling like I wanted a quick makeover. When I looked through my tote of crafting goodies, I saw some balloons. Have you seen balloons being stretched on vases? Well, I have and thought adding my colorful balloons to my vase would be a super quick way to add a splash of color to my vase. The best part about this DIY is you can change the color of your balloon to completely change the look of your vase!

Supplies:

– Vase

– Balloons

– Scissors

{Step 1}: Cut your balloon about an inch from the top.

{Step 2}: Turn your vase over and stretch your balloon over your vase.

meghan quinonesComment
How to Make a Beaded Necklace

I think I finally created the ULTIMATE statement necklace!

Thanks to Beadmixer, I found the perfect beads and findings for, what will be, my new favorite necklace! When I was looking around their online shop, I had a hard time staying focused. They have so many brightly colored beads and other interesting findings. I knew I wanted to make a brightly colored necklace that was super eye-catching. When I saw they not only had large turquoise howlite beads (yes, I know this is no surprise!), but they also had the bronze settings for them. My search was over!

I decided to build my extreme statement necklace around the turquoise beads. I knew I wanted to take advantage of the holes surrounding the bronze setting. When I came across the faceted cobalt beads I thought they would be the perfect addition to my necklace. Now all I needed was something dangly to hang from my cobalt beads. I landed on these amazing citrus faceted jade beads. These beads are so cheery, they look like candy!

Supplies:

– 6 Turquoise Howlite Cabochon

– 50mm Head Pins

– 40mm Eye Pins

– 15 28×11 Jade Faceted Drop Citrus Green

– 5 40X30 Bronze Settings

– 25 8×5 Cobalt Blue Acrylic Faceted Rondelle

– 5 10mm Bronze Jump Rings

– Jewelry Chain

– Glue

– Jewelry Tools

{Step 1}: Glue your cabochons to the bronze setting.

{Step 2}: Put your eye pins through your cobalt beads. Trim the ends down so they are 10mm. Then,use your pliers to round the end, forming a loop.

{Step 3}: Put your head pins through your jade beads. Trim the ends down so they are 9mm. Then, use your pliers to round the end, forming a loop. Hook the loop on the bottom loop of your cobalt bead.

{Step 4}: Count 4 holes down from the side of your setting. Open the top loop of your cobalt bead, hook it through the hole in your setting, and close the loop. Skip a hole, then add another bead. Keep skipping and adding beads until you have 5 beads connected. Repeat all steps for your other settings.

{Step 5}: Open your jump rings and connect them to the third hole from the center of your settings. Connect all of your settings together.

{Step 6}: Put a jump ring in the third hole from the center of your end settings. Slide your chain on your two open jump rings and connect. I made my chain long enough so I didn’t need to add a clasp. I can just slip my necklace over my head!

meghan quinonesComment
How to Make a Leather Tassel

I am kind of dying right now at my “Phillip Lim” tassel makeover! Since I am a thrifty/crafty person, I am not one to spend a ton of money on handbags (I would say this goes for pretty much everything!). When I saw the below Phillip Lim bag, my heart skipped a beat. When I saw the price tag, my heart almost STOPPED!!!

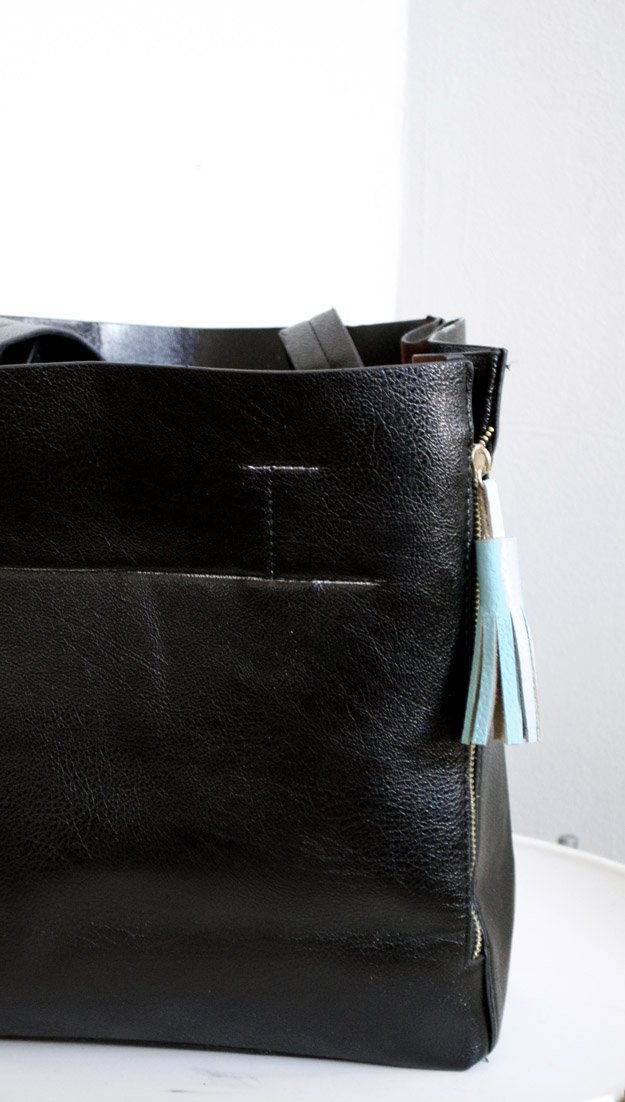
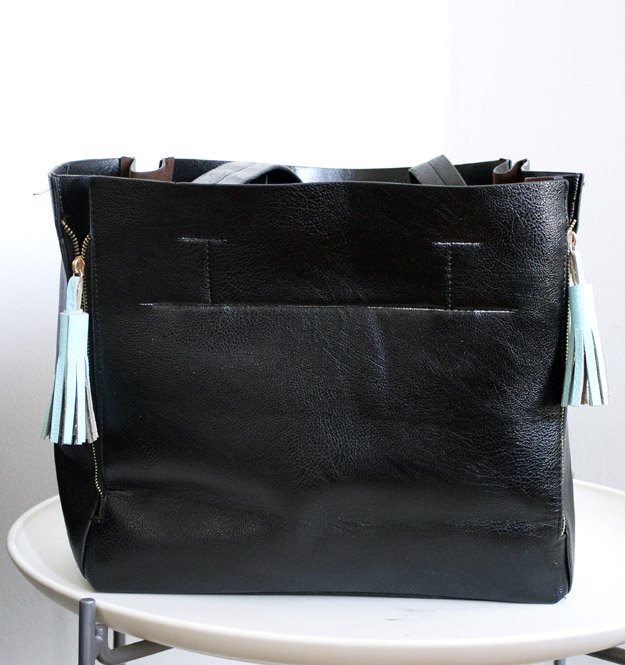
Recovering from my near heart attack, I was on a mission to find something similar to the Phillip Lim handbag, but for a fraction of the price.  Here we have a bag that looks pretty close to the Phillip Lim bag, but only costs $27.00! I got this little gem from Sammy Dress. They literally have HUNDREDS of handbags! The styles they have are super trendy and look like versions of your favorite designer handbags, but for the fraction of the price!

Anatomy of my Sammy Dress purse:

– It has 4 zippers on the 4 edges of the purse

– You can unzip all 4 zippers to expand the bag to fit all of your goodies, or you can zip all of the zippers to give it more of a box shape (Love this!).

– There is a lined pouch that snaps into the inside of the bag, providing additional storage space.

– There is another zippered pocket sewn into the side of the bag.

– The center pouch is removable. So, you could also use it as a clutch! YAY!!

– This bag is super durable and keeps its shape well. – You basically get three purses in one, which means you are spending $9.00 a purse. You can’t beat that! To Springify my purse, I decided to add a pretty blue leather tassel.

Supplies:

Leather Scraps (OR PURCHASE READY MADE LEATHER TASSELS HERE)

– Paint

– Paint Brush

– Scissors

– Glue

{Step 1}:  Cut 4 pieces of leather that are 4 1/2 inches by 3 1/2 inches. Cover all of your leather strips with paint.

{Step 2}: Cut 1/4 inch slits in your leather, stopping when you get 1/2 inch from the end of your leather. Cut 4 strips of leather that are 1/4 inch wide and 3 1/2 inches long.

{Step 3}: Fold one of the strips you cut in half. Put glue on the top part of your leather strip. Lay your cut piece of leather on the upper left hand side.

{Step 4}: Begin rolling your cut piece of leather over your strip, forming your tassel. {Step 5}: Open the jump ring on your purse. Slide your zipper off and your tassel on. Close the jump ring. 

meghan quinonesComment
DIY Upcycled Earrings Using Paper

When my J.Crew lookbook arrives in the mail, I immediately perk up. I love getting this in the mail! If I could insert myself into the catalog and put on all of the clothing, I would be one happy lady. All of the lovely colors, patterns, and textures just draw me in.

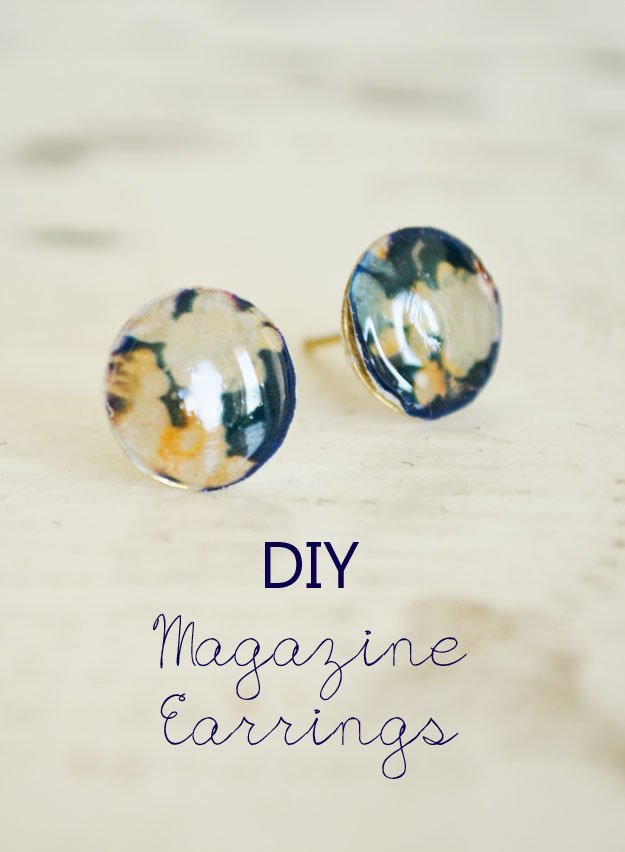
As I thumbed through the Spring lookbook, I came across a  patterned dress that seriously caught my eye. The floral pattern on this dress was vintage, yet modern. The color combo was stunning. This dress inspired me so much that I decided to do a DIY project using the picture of the dress from my lookbook!

I took the picture of the J.Crew dress that inspired me and turned it into stud earrings. I can now wear the very pattern I was drawn to, but on my ears! I love it when recycling can be turned into something functional AND pretty. I could create an entire earring line just from my 2014 J.Crew Spring lookbook! Just think of all of the fun you could have with this DIY project!

Have you ever recycled a magazine you had? If so, what did you do with it?

Supplies:

– Flat Earring Stud Blank

– Mod Podge Dimensional Magic

– Scissors

– Mod Podge

– Pencil

– Scissors

– Pencil

{Step 1}: Trace your earring on your selected pattern and cut out.

{Step 2}: Put Mod Podge on your earring and glue your magazine circle to it.

{Step 3}: Cover your paper with Mod Podge Dimensional Magic.

{Step 4}: Let the dimensional magic dry and you are in business!

meghan quinonesComment
How to Make a Beaded Statement Necklace

I was walking by  Banana Republic the other day when I spied their “extra 40% off sale items” sign. I really had no reason to go into their store, but the Damn sign got me! I, of course, picked up a few items since they were on sale. Well, mission accomplished. You got me to make a purchase, even though I was not actually looking for anything!

When I was heading up to the front of the store to checkout, I passed the jewelry section. I stopped for a quick glance and saw this AMAZING red and turquoise necklace. When I looked at the price tag, I immediately put it down. It was $85 and was NOT an extra 40% off. Since I was not going to shell out that kind of money for a necklace, I did the next best thing. I took a picture of the necklace with my phone so I could make a cheaper version of it, duh!

All I really did to create my version of the necklace was use my trusty glue gun. I found some red flower buttons that I thought would be perfect for my necklace! I also bought some turquoise beads and a piece of cobalt felt. I really love the way the colors come together. 

{Photo Credit: Banana Republic}

Supplies:

– 4 Small Flower Buttons

– 1 Large Flower Button

– 3 Strands of 8mm Beads

– 1 Sheet of Cobalt Felt

– Gold Jewelry Wire

– 4 5mm Gold Jump Rings

– 2 8mm Gold Jump Rings

– Gold Chain

– Gold Clasp

– Jewelry Pliers

– E6000 Glue Hot Glue Gun and Glue (I decided this would be better)

{Step 1}: Put glue on the back of all your buttons and glue them to your felt (make sure you space them out). Then, put glue on the bottom of one bead and glue it next to your button. You will want to put glue on the bottom and one side of another bead. Glue the side to the side of your other bead. Keep going around your buttons, until you have created a circle.

{Step 2}: Trim around each of your beads. I left a little of my felt showing.

{Step 3}: Cut your jewelry wire so it is about 1/4 inch longer on each side of your bead.

{Step 4}: Use your pliers to create a loop at each end of your jewelry wire.

{Step 5}: Lay your bead on your remaining felt. Cut out a piece of felt that is the same size as your bead. Put your jewelry on the top section of your bead, put glue on your felt circle, and glue it to the back of your felt. This will glue your wire to your bead.

{Step 6}: Open your small jump rings and put them through the loops on your beads, connecting them together. Add your larger jump rings to the bead on the end. Then, add your chain and clasp.

meghan quinonesComment
How to Make a Clay Charm

I was looking through my Pinterest Board of all of my Necklace Inspirations and decided it was time to make a necklace. I feel like I have not made a necklace in forever! When I was looking through my pins, I saw this gold linked necklace and wanted to create my own version.

I feel like I have been seeing a ton of necklaces made out of clay. When I looked at my inspiration, I thought it would be a great candidate to be recreated using clay! Yep, I made clay rings and attached them to a chain for a super cheap version of my inspiration necklace. This necklace was about $5!

Supplies:

– Gold Clay

– Necklace with Clasps

– Two Small Jump Rings

– Pliers

{Step 1}: Pinch off a small piece of clay. Roll your clay so it is about 3mm in diameter.

{Step 2}: Cut a piece of clay that is 1 inch long and other piece that is 1 and 1/4 inch long.

{Step 3}: Take your longest piece of clay and put the two ends together. Use your finger to smooth the end.

{Step 4}: Take your smaller piece of clay and run it through your circle and connect the ends.

{Step 5}: Line up your chain and cut it in the center.

{Step 6}: Open your jump rings and connect your links to the ends of your necklace. You are finished!

meghan quinonesComment
How to Turn a Crewneck Sweater Into a Cardigan

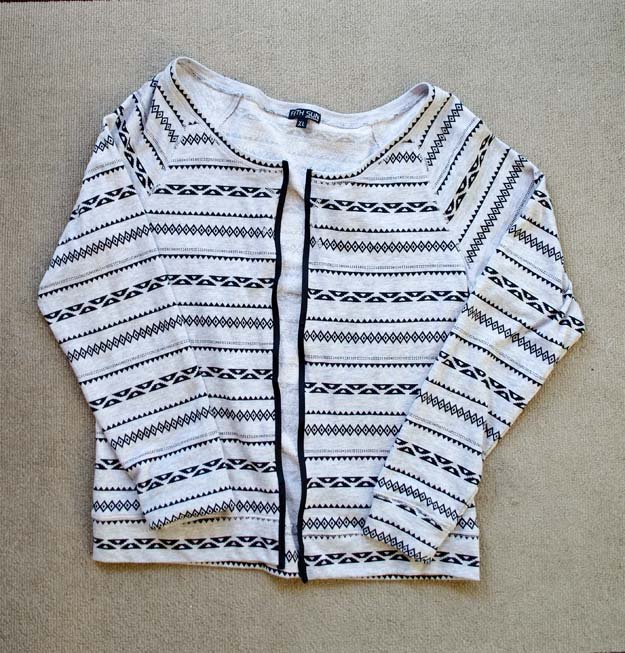
A few weeks back I was target shopping the sale rack when I came across a killer steal! I found this tribal crewneck sweater on sale for $5.00!  Now, I didn’t really need this sweater, but I could not pass up such a great deal!

My new sweater sat in the bag for a couple of weeks until I decided to dig it out. When I looked at it, I thought I would like it better if it were a cardigan. So, I decided a little transformation was in the cards. I cut my sweater down the middle and added some seam binding for an instant change-up!

Supplies:

– Sweater

– Seam Binding

– Scissors

– Straight Pins

– Sewing Machine

{Step 1}: Cut your sweater down the center.

{Step 2}: Lay your seam binding along side the cut edge of your sweater. Cut it so it is an inch longer on each side. Repeat on the other side.

{Step 3}: Open your seam binding, place your sweater inside, and pin. Repeat on the other side of your sweater.

{Step 4}: Sew both side of our sweater and you are finished!

meghan quinonesComment