Untitled-3.jpg

Blog

How to Decorate a Clipboard from the Dollar Store

I figured since it has been FOREVER since I last posted a Dollar Store Challenge project, it was about freakin’ time I did!

One of the dollar store supplies I have left is a clipboard. It was a sad, boring,  brown clipboard. I thought it would be awesome to stick the with New Year’s resolution of  “Let’s get organized” so I made my clipboard into a message board. It’s a place to collect receipts, important documents, inspirations, and of course pictures of dogs you would love to own.

This was  super easy transformation. All you really need to do is draw and color. How easy is that? I drew triangles all over my clipboard. I mean, why not? Geometric patterns are so hot right now. This little project set me back about $7.00. Just think, you could make multiple clipboard message boards to be the queen or king of organization!


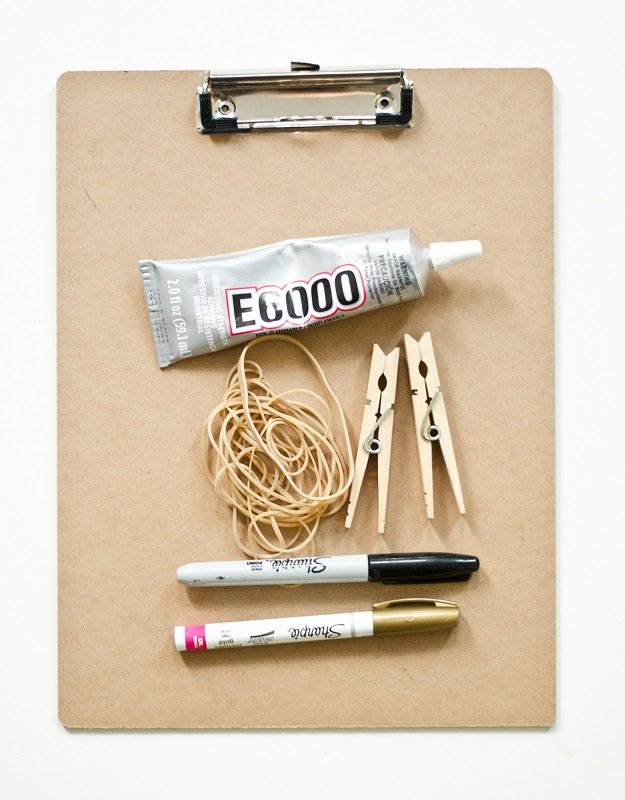
Supplies:

–       Dollar Store Clipboard

–       Dollar Store Rubber Bands

–       Dollar Store Clothespins

–       Black Sharpie Marker

–       Gold Sharpie Paint Marker

–       E6000 Glue (or super Glue)

{Step 1}: Draw black triangles all over your clipboard and color them in.

{Step 2}: Draw gold triangles all over your clipboard and color them in.

{Step 3}: Decorate your clothespins with your markers

{Step 4}: Stretch your rubber bands over the top of your clipboard. Stretch them however you would like. Finally, glue your clothespins to the bottom of your clipboard.


meghan quinonesComment
How to Customize Mittens for Kids

I was checking out at Joann’s the other day, when I spied these adorable pint-sized mittens. I clearly have no need for pint-sized mittens, but then it occurred to me. I know someone who is pint-sized; My nephew!  My nephew is not quite big enough to fill-in these mittens, but one day he will be.  This just gives him something he will have time to grow into.

I love making cute little monster crafts. Why, you ask? Because when you create a monster, imperfection is a must! You can create any crazy shape you want and put random colors together. Since I am not quite a perfectionist, this is AWESOME for me! I decided on a one-eyed monster for Gavin’s mittens. I mean, what little boy wouldn’t love a cute monster smiling back at him?

Have you ever made anything “monster” related? If so, what did you make?

Supplies:

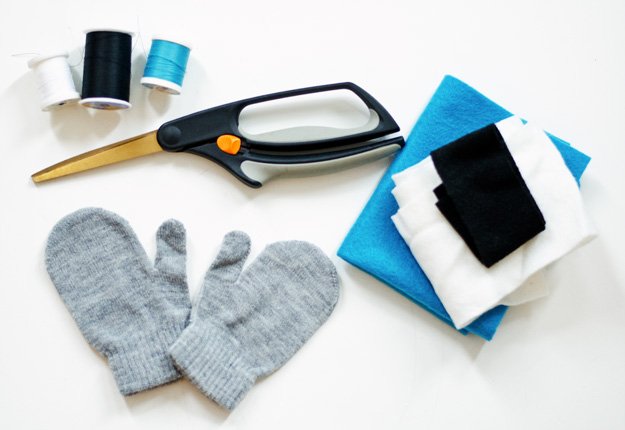
– Blue, Black, White, and Green Felt

– Small Mittens

– Black, White, and Blue Thread

– Needle

– Wonder Under

– Scissors

{Step 1}: Cut out two blue circles with “feet”, two large white circles, two small black circles, and two pieces of zig-zig green “hair”.

{Step 2}: Sew your white circle to the center of your body. Then, sew your small black dots to the center of your large white circle. Straight stitch a cute little side mouth. Sew your green hair to the top of your monster with your blue thread.

{Step 3}: Trace the outside of your monster on your Wonder Under and cut it out. Iron the Wonder Under to the back of your monster. Let your monster cool.

{Step 4}: Peel the paper off of your Wonder Under and center your monster on your mittens. Iron your monster to your mittens. Let cool and enjoy your Monster Mittens!

meghan quinonesComment
How to Make a Wooden Bracelet

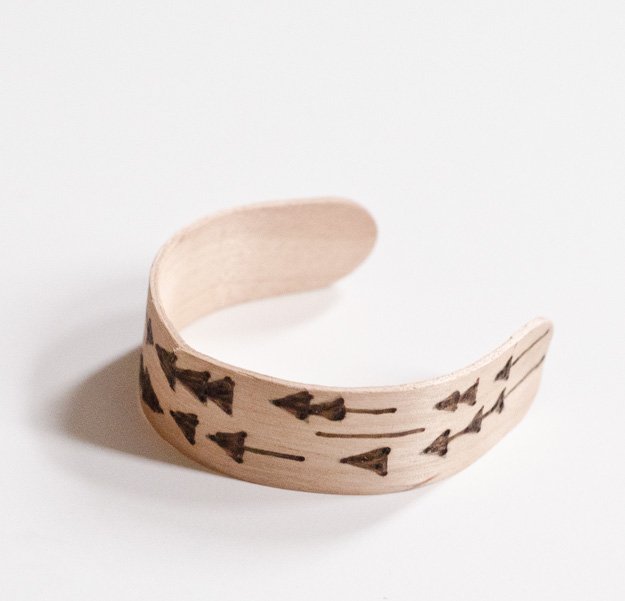
Remember the popsicle sticks I bought from the Dollar Store? Well, when I looked at them I got a bright idea.  I decided to turn them into bracelets, not just boring wood bracelets, but wood burned bracelets!

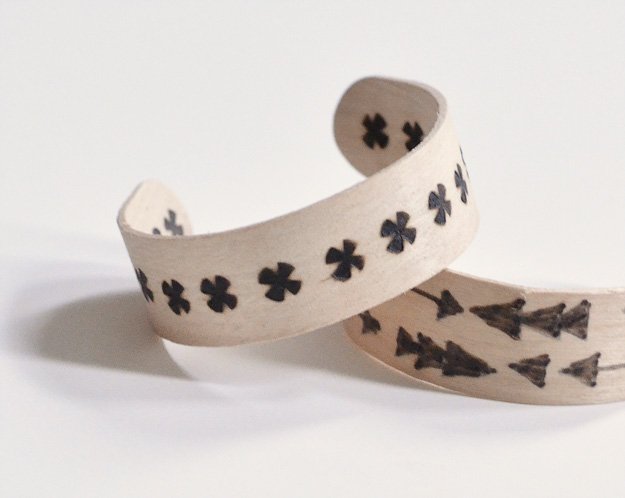
I bought a wood burner about a month ago after using one for a work project. I had not used a wood burner in YEARS. I am now obsessed with my wood burner! No piece of wood is safe. I want to burn designs into all of the wood I see! I took my obsession even further and bought these cool metal attachments. I took one look at them and knew they would fit my wood burner! I used one of the designs to create one of my bracelets (the one that looks like “x’s”).

A special shout out to Liz and all of her 6th grade friends: Thanks for following my blog! This is a project all of you can do! Get together and make custom bracelets for all of your friends. :)

***UPDATE***

Carolyn shared this technique with me… She put her sticks inside of an Arm & Hammer detergent cap. She said they are the perfect size for your bracelets! Once the sticks are placed inside of the cap, she put clips on each open end and let them dry over night. Thanks for sharing this tip, Carolyn! – Meghan

Supplies:

– Popsicle Sticks (From the Dollar Store)

– Wood Burner

– Pencil

– Round Object (I used an air freshener can)

– Rubber Bands

– Pot

{Step 1}: Draw your design on your popsicle sticks with your pencil . Then go over your designs with your wood burner.

{Step 2}: Fill a pot with water and boil. Once your water is boiling, drop in your popsicle sticks. I let my sticks boil for about 15 minutes.

{Step 3}: Remove your stick one-at-a-time and start to lightly bend it, creating a curve. Then, wrap the stick around the air freshener and secure it with your rubber band. Let your sticks dry. I let my sticks dry over night.

{Step 5}: Unwrap your rubber bands and you have a wood burned wooden bracelet!

meghan quinonesComment
How to Make a Custom Stamp

Back in September I was approached by BuzzFeed DIY to come up with a DIY stamp project. I was super pumped! I mean, BuzzFeed is HUGE!

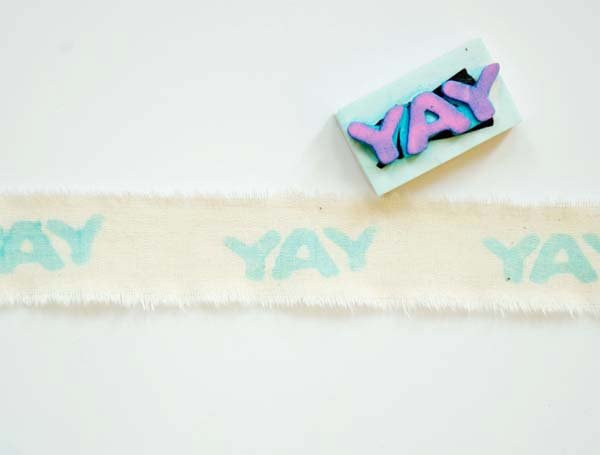
After I did my happy dance, I thought long and hard about what kind of stamp I would create and what the stamp would say. I was at Joann’s and saw these foam sticker letters and thought they would be perfect for a DIY stamp.

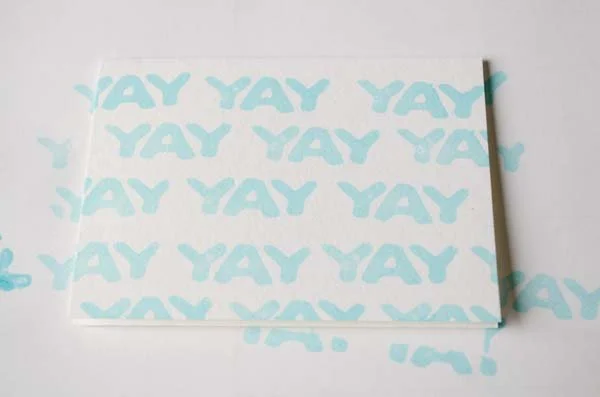
When I was trying to decided on a word for my stamp, I knew I wanted one that could be used for multiple occasions. Then, it hit me. “Yay” can be used for pretty much anything. For example, “Yay! You quit your job!”, “Yay! You’re getting married!”, “Yay! You had a baby!”.  You get my point. I added my “Yay” letters to another piece of foam and then glued it to an eraser. I stamped fabric as well as a card with my “Yay” stamp. You could really have a lot of fun with this stamp!

How would you use the “Yay” stamp?

Supplies:

– Sticky foam letters

– One sheet of foam

– Rubber eraser

– Ink pad

– 1/8 yard of muslin fabric

– Scissors

– Super glue

{Step 1}: Place your stickers on your sheet of foam, spelling out “YAY” or whatever other message you have. (Note: You will need to use all capital letters in order to have your message stamp the correct way.) Next, use your scissors to cut around your letters, making sure you don’t cut through the foam between your letters.

{Step 2}: Apply super glue to the foam behind your letters. Glue the foam to the eraser. Let the glue dry.

{Step 3}: Grab your muslin. Take your scissors and make one cut an inch from the edge of your fabric and an inch down. Next, take the two open sides and rip the fabric all the way to the bottom, completely separating the fabric.

{Step 4}: Make another cut an inch away from the edge you just ripped and an inch down. Once again, rip your fabric tearing it until you have a fabric ribbon. Trim/remove any loose strings.

{Step 5}: Take your stamp and press it into your ink pad. Press it a few times to make sure you have enough ink on your stamp. Press your stamp onto your fabric, starting at the end. Ink your stamp again and press it onto your fabric an inch away from the “YAY” you just made. Repeat this until your entire ribbon is stamped. Wrap your package and enjoy!

You can take your wrapping decoration one step further and stamp a blank white card to match. Stamp “YAY” all over the front of your card starting at the top, working your way down.

meghan quinonesComment
How to Paint on Glass

I am really bad at being organized, especially when it comes to my jewelry. I usually forget to take my earrings out before I go to bed. I end up throwing them on a side table only to panic in the morning when I can’t find them.

To help me get organized I decided to turn my glass pinch dishes from the Dollar Store into a pretty place to put my jewelry. Now, there were 4 dishes I bought for a dollar, but being my clumsy self, I broke one of the dishes. So, I only made 3 dishes!

I now have jewelry dishes all over my apartment so I won’t lose my earrings ever again!

Supplies:

– Dollar Store Pinch Dishes

– Gold Paint

– Varnish Gloss

– Paint Brush

{Step 1}: Draw gold dots all over your dishes.  I made the dots on one of my dishes a bit larger than the other two, just to switch it up a bit. Let your paint dry.

{Step 2}: Cover all of the outside of your dishes with your gloss varnish.  Let the gloss dry.  Once it is dry, throw in your jewelry and enjoy!

meghan quinonesComment
How to Dye Wooden Beads

Back in the day homemade pot holders were the definition of DIY and everyone was on the bandwagon. I’m not certain, but I think these looms have become popular again and are on the market. Either way,  I have a modern way to keep your hot dishes off of your counter.

You can made a rustic trivet out of wooden beads, liquid dye, and leather cord. This would make an amazing gift for someone who loves baking. You could also give it as a housewarming gift.

meghan quinonesComment
How to Make a Sock Pet

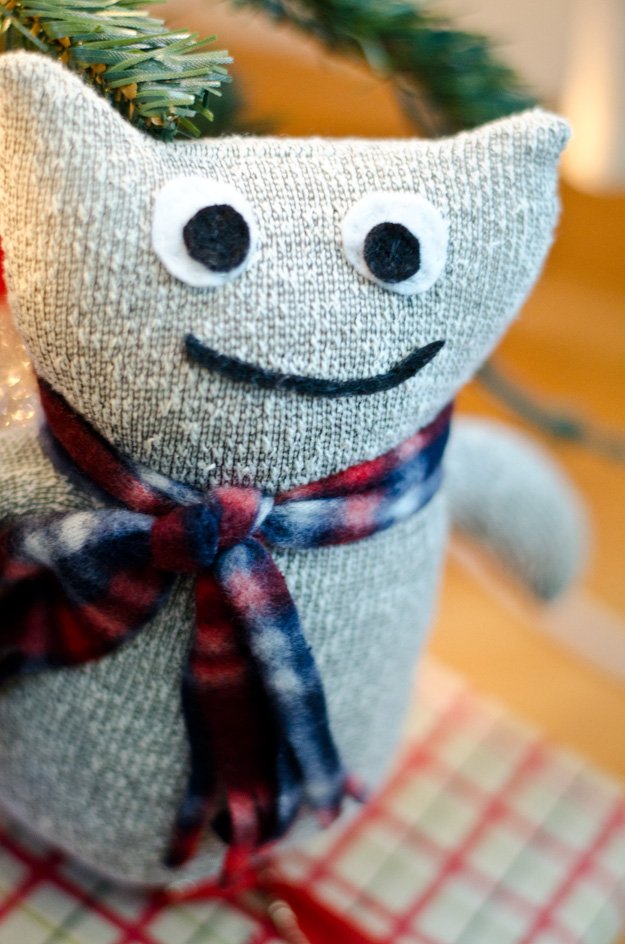
Socks aren’t normally cute. They are usually smelly and typically have a hole or two (at least mine do!). Well, not this sock! This little sock monster is oh, so cute!  I mean, look at him. He is ready for the Chicago Winter with his adorable plaid scarf.

I took one of my socks from the Dollar Store and added a little piece of my Dollar Store Scarf to make my sock monster. This would make a great gift for a kid. Could this sock monster be your new “Elf on the Shelf”? Imagine all of the mischief this cuddly little monster could get into!

Do you partake in the Elf on the Shelf? If so, what’s the funniest thing your elf has done?

Supplies:

– Dollar Store Socks

– Dollar Store Fleece Scarf

– Batting

– Felt

– Thread and Needle

– Scissors

– Sewing Machine (or you could hand sew)

{Step 1}: Cut up one of your socks. You need to make two cuts at the top of your sock. As you can see, I made “ears” on the side of my head by cutting two triangles. I also cut two arm holes in the side of my sock. I initially cut “legs” at the bottom, but then realized I didn’t want the legs. So, you don’t have to make the slit at the bottom like I have in my picture.

{Step 2}: Cut out 2 small black felt circles and 2 larger white felt circles as well as a thin strip of black felt for your monster’s mouth. Sew the black circles onto your white circles. Then, Sew your eyes and mouth onto the face of your sock monster.

{Step 3}: Take your two arms and fold them so they are inside out. Sew the longest opened side. Leave the shorter side open.

{Step 4}: Turn your arms so they are right side out. Then, place them inside of your arm holes. Pin the opening of your arms and the arm holes together. Sew around the opening. Make sure you do not sew the opening shut. If you do you won’t be able to stuff your arms!

{Step 5}: Once your arms are sewn, turn them so they are right side out.

{Step 6}: Take your batting and fill in your arms. Then, fill in the top of your head, working your way down to the bottom of your monster.

{Step 7}: When you get to the bottom of your monster, tuck in the end of your sock so you have a nice finished edge. Then, hand sew around the bottom edge.

{Step 8:} Once you have gone all the way around the bottom, pull your thread tight, pulling in the bottom and closing it up. After it is completely closed, do a quick stitch and tie a knot.

{Step 9}: Cut a small piece of fleece. Take your scissors and cut small slits at both ends. Then, tie your scarf around your monster’s neck. You are finished!

meghan quinonesComment
How to Make a Stencil Using Wax Paper

Have you heard of Kale? Well, if you haven’t I am surprised. Kale seems to be all of the rage these days! Admittedly, I actually like the stuff.  It’s kinda funny because I remember seeing kale back in the day being used as a garnish when you would go out to eat.  No one would actually eat the stuff. Funny how things change.

I was checking out West Elm’s website the other day and I saw these adorable mini leather zip pouches. I added them to my wish list (and am already deciding how I will alter it!). I also saw a tote that had “Oh Kale Yeah” on the front of it. Ummm…AWESOME! See, even West Elm is digging the whole Kale fad. :)

Check out my version of the West Elm tote below!

Are you familiar with Kale? Do you like it, or are you ready for this food fad to go away?

{Photo Credit: West Elm}

Supplies:

– Canvas Tote

– Fabric Paint

– Fabric Paint Brush

– Wax Paper

– Printer Paper

– Tape

– Scissors

– Cardboard

– Black Fabric Marker

– Printer

– Pencil

{Step 1}: Take your piece of print paper and place a piece of tape in the center.

{Step 2}: Place a sheet of wax paper over your tape. Then, cut your wax paper so it is the same size as your printer paper. Tape down the ends (this will help prevent your wax paper from getting jammed in your printer).

{Step 3}: Open up a new word doc. Spell out “Oh Kale Yeah”. I used the font Bebes (size 75) for Oh and Yeah. I used Marketing Script (size 175) for Kale. Both of these fonts can be found at www.dafont.com. Put your wax paper into your printer. Make sure you have the correct side up. When you print out your image, make sure you invert it so it prints out backwards.

{Step 4}: Place your image face down in the center of your tote. Then, use a ruler to rub over  the paper.

{Step 5:}  Your image should be transferred to your tote when you pull off your wax paper.

{Step 6}: Start by outlining your your letters with your paint. Then, begin to fill in your lettings with paint.

{Step 7}: Continue filling in your letters until all of them have been filled in.

{Step 8}: I drew a leaf of kale on a piece of paper then traced it onto my tote. I then pained it. After my letters were dry, I went around my design with my fabric marker twice. Then, I painted both sides of my two tote handles.

{Photo Credit: Bottom-West Elm}

meghan quinonesComment
How to Make a Photo Banner

My family loves surprise parties. We REALLY love them. Pretty much every important birthday or anniversary in my family equals a surprise party.

My mom’s 60th birthday was yesterday (Happy Birthday, Mom!). My brother and I decided a surprise 60th party was a must.  We knew we had to plan her surprise party before her actual birthday to make sure we could throw her off.  We threw her party back in October; a month before her actual birthday. When my brother and I were planning her party, I knew I would handle the decorations.  I wanted to keep them simple since I feel like I always seem to have 20 projects going on at one time. I thought it would be cool to try to incorporate old pictures of my mom into her party. That’s when my vision was born.

I got a bunch of old pictures of my mom, blew them up so they were the size of an 8 1/2 x 11 sheet of paper.  I printed them in black and white.  Then, I colored in the white parts of the photo with bright colors and designs. My pictures had kind of an Andy Warhol type of vibe. To add more detail (and fun) to the pics, I added birthday hats to my mom and anyone who was in the picture with her. They ended up being hilarious! Since my little nephew couldn’t make the party, I also printed a picture of him with a hat on.

Additional decorations I made were:

– “Happy 60th Birthday!” banner  with glitter paper.

– I wrapped plastic shot glasses with silver duct tape to create mini bud vases and added yellow flowers.

– I also made silver tissue paper tassels for the birthday banner.

The party came together nicely. My mom was SO surprised. I thought maybe she was lying, but when I looked back at the pictures I took and you can see in her face that she had no idea! The party was a success!

meghan quinonesComment
How to Paper Mache

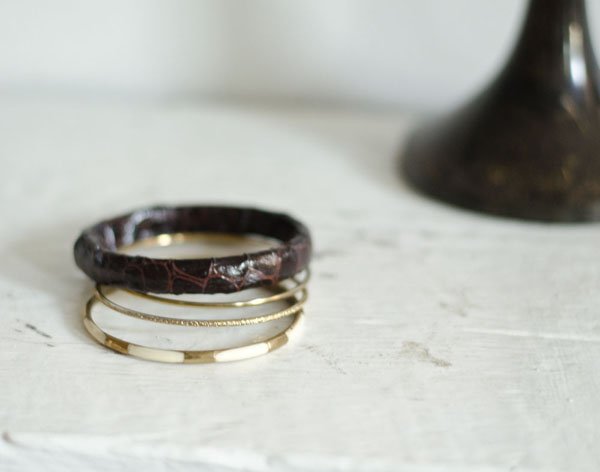
So, I went WAY out-of-the-box with this CIY! Instead of making a leather bracelet, I made a bracelet that looks like leather!

I was at the craft store and spied this awesome leather looking paper. Of course, I knew I had to use it for something.  Then, it hit me! Why not use this to make my leather bracelet? So, there you have it folks, a leather bracelet that isn’t leather at all!

What do you think?

Supplies:

– Old Bracelet

– Faux Leather Paper

– Scissors

– Mod Podge

– Paint Brush

{Step 1}: Put your bracelet on your paper.  You want to cut a strip of paper that is thick enough to have both sides folded in and long enough to cover your entire bracelet.

{Step 2}: Put Mod Podge over your bracelet.

{Step 3}: Cover your bracelet with your paper, making sure your bracelet is in the center of your paper. When you get to the end, fold your paper under and glue it down. This will give you a nice edge.

{Step 4}: Put Mod Podge on one side of your paper. Fold your paper in. Smooth out your paper while you press down on your paper and move around your bracelet.

{Step 5}: Repeat Step 3 with the other side of your paper.

{Step 6}: Put a coat of Mod Podge over your paper.  You are finished!

{Photo Credit: Bottom-Sevan Bicakci}

meghan quinonesComment
How to Create a Faux Clay Vase

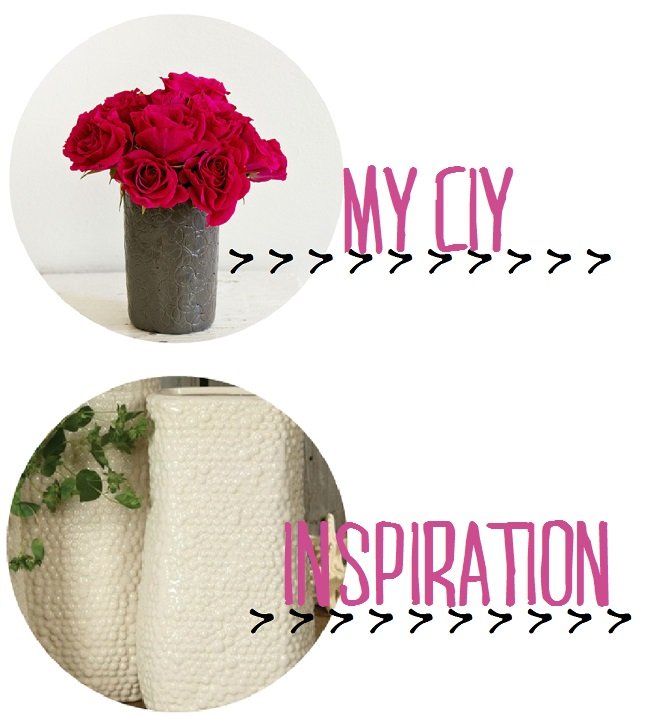
As I thought about how to tackle this textured clay vase  project, I knew I wanted to find some sort of easy workaround.  Well, mission accomplished! I was able to transform my glass vase into a clay one!

I had either an old shot glass or a juice glass in my cupboard.  This glass had been used in the past as a vase to hold my small flower buds (sorry, Mike if this used to be an accessory in your bar!).  As I tried to think of a way to create a clay vase that could hold water and would have a sturdy form, a light bulb went off. Wrap some stinkin’ clay around the actually vase!

I was not sure how well this would work.  I started to work with my clay a bit, wrapping it around my vase. Viola! A glass vase covered in clay, that actually looks like it’s a clay vase. Boom!

Supplies:

– Glass Vase or Container

– Sculpey Clay (I decided to go with gray)

– Clay Cutter (mine came in a pack with about 7 or 8 other shapes)

– Rolling Pin

– Knife

– Mod Podge

– Paint Brush

{Step 1: Roll out your clay so it is a bit longer than the length of your vase. Then, roll your clay out so you have enough to wrap around your entire vase.

{Step 2}: Start wrapping your clay around your vase.  As you roll your clay around your vase, use your knife to trim the clay down around the top and bottom of your vase.

{Step 3}: Once you have wrapped the clay around your entire vase, cut off the excess clay. Use your fingers to smooth out the seam on your vase where the two clay ends meet.

{Step 4}: Take your fingers and smooth out the clay around the top and bottom of your vase.

{Step 5}: Grab your circle clay cutter and begin making impressions all over your vase (NOTE: do not push too hard, you do not want to actually cut out a piece of clay).

{Step 6}: I went back and made more circle impressions, overlapping all of my circles. Once you finish with your pattern, bake your clay according to the package it came in. Let your clay cool once it is done baking.

{Step 7}: Take your Mod Podge and cover your vase. Let the glue dry.  This will give your vase a finished look. You are finished. Enjoy!

{Photo Credit: Bottom:Wayfair}

meghan quinonesComment
How to Make a Yarn Flower

I might be obsessed with yarn balls now!  I had so much fun making these little guys for my yellow flowers.  Trimming the yarn balls brought me back to the days when I used to push Play-Doh through my hair cutting salon.  I had so much fun cutting hair then re-growing it.   I would spend hours doing this!  I may have to make an entire bouquet of yarn flowers to get my fix in!
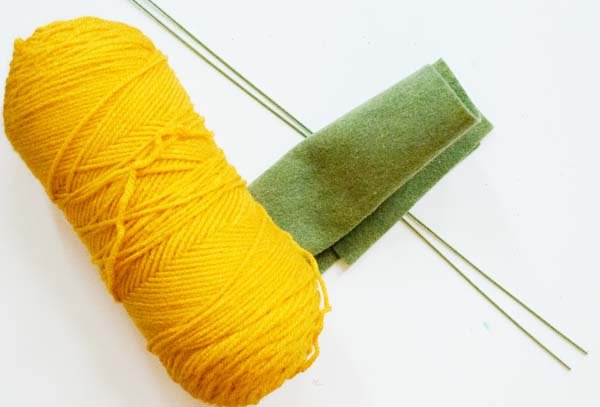
Supplies:

– Yellow Yarn

– Green Floral Wires

– Green Felt

– Scissors

{Step 1}: Wrap your yarn around your four fingers 60 times.

{Step 2}: Cut a long piece of yarn. Thread it between your middle finger so it will go up and over the center of your yarn. Tie a tight knot in the center of your yarn.

{Step 3}: Take your floral wire and wrap it around the yarn you just tied.

{Step 4}: Use your scissors to cut all of your yarn loops you made.

{Step 5} Use your scissors to trim your yarn into a perfect ball.

{Step 6}: Cut a felt square an 1 & 1/2 by an 1 & 1/2. Fold your felt square in half and cut a half circle. Make sure you do not cut on the fold.

{Step 7}:  Then, cut out notches in your circle. Cut a tiny hole in the center of your felt.

{Step 8}: Slide your wire through the hole in your felt. Move your felt to the top of your flower so it is right under your flower.Enjoy your flowers!

{Photo Credit: Anthropologie}

meghan quinonesComment
How to Make a Crocheted Necklace

I did it! I figured out the look of crochet, without needing to actually know how to crochet!  You may be asking yourself “How did she do this?”.  Well, the secret is in the trim I used.  I found a braided trim that already had texture going on.  All I basically did was tie knots.  It was really quick and easy to make this “crocheted” necklace.  Try it out!

Supplies:

– 1 yard Braided Trim

– Jewelry Chain (I bought my chain necklace from Forever 21)

– 2 Jump Rings

– Necklace Clasp

– Hot Glue Gun and Glue

– Tape

– Scissors

– Jewelry Tools (pliers will also work)

{Step 1}: Tie a knot in your trim about 7.5 inches from one end.

{Step 2}: Then, take the longer piece of trim and run it under the shorter piece of trim, then over the shorter trim, then back through the loop you made.

{Step 3}: Pull your knot tight. Make sure you keep the knot flush to the prior knot and keep the bottom loop of the knot a little longer than the prior knot.

{Step 4}: Do the same knot technique for your third knot.  Make sure you keep the knot flush to the prior knot and keep the bottom loop of the knot a little longer than the prior knot.

{Step 5}: Tie your fourth knot.  Make sure you keep the knot flush to the prior knot and keep the bottom loop of the knot a little shorter than the prior knot.

{Step 6}: Tie your fifth knot.  Make sure you keep the knot flush to the prior knot and keep the bottom loop of the knot a little shorter than the prior knot.

{Step 7}: When you tie your fifth knot, you can tie it like a regular knot.

{Step 8}: Wrap tape around your two ends of trim to keep your trim from fraying.

{Step 9}: Trim down your two ends. Take one end and glue it the back of your necklace. Take your other end and glue it over the end you just glued.

{Step 10}: Take your pliers and open one of your chain links. Take your open link and run it under one of the braids.

{Step 11}: Repeat step 10 to add chain to the other side of your necklace.

{Step 12} Use your pliers to open up your jump rings. Slide one jump ring through one of your chain links, then slide on one end of your clasp.  Repeat this step to add the other side of your clasp to your necklace.

Enjoy!

meghan quinonesComment
How to Make a Paper Napkin Ring

This project is so easy even a child could do it! I decided to transform my TJ bag into a cute napkin ring.  This napkin ring really is quite easy to make (trust me!).  If you are having guests over, but aren’t feeling too fancy why not make these playful napkin rings?  They make you look put together, but no overly stuffy.  Now, that’s my kind of vibe!

Have you even made napkin rings? If so, what kind did you make?

Supplies:

– Trader Joe’s Bag

– Glue Gun and Glue (you could use regular glue)

– Ruler

– Pencil

– Scissors

{Step 1}: Cut a strip of paper from your bag that is 5 1/2 inches long and 2 and 1/2 inches wide. Do multiple cuts into your paper making a fringe, stopping before you actually cut all the way through the paper. Keep your cuts close to one another.

{Step 2}: Rip a handle off of your bag.  Take your handle and cut it so it is 5 and 1/2 inches long. Roll your handle up, giving it a nice round form.  Put glue on one end of your handle and glue it to the other end.

{Step 3}: Take the fringe you just cut and roll it up making sure the bottom is tight.  Place glue on the bottom open edge gluing it shut (you don’t want your fringe to unravel).

{Step 4}: Put hot glue all over the bottom of your fringe and glue it to the center of the ring you made.  Let the glue dry.  Once the glue is dry, start fanning out your fringe.

 ENJOY!

meghan quinonesComment
How to Make A DIY Mirror

Have you seen all of of the toilet paper art popping up on Pinterest?  Well, if you haven’t Pinterest has turned toilet paper rolls into basically the equivalent of duct tape.  There are apparently 100 thousand uses for these puppies.

So, I have decided to jump on board with the toilet paper art trend!  I have to admit, this new art form was pretty much a perfect fit in creating my own version of the Crate and Barrel mirror. Now, I know mine is not actually wrought iron (and it’s a bit smaller that the CB one), but it seriously only cost about $15 to make!

What do you think?  Would you ever consider toilet paper roll art?

Supplies:

– Toilet Paper Rolls (I used about 7 for mine)

– Round Piece of Wood (mine was 6 inches)

– Round Mirror (mine was 5 inches)

– Black Spray Paint

– Tack

– Wire, String, or Cord

– Scissors

– Glue Gun and Glue

{Step 1}: Spray paint the inside and outside of your toilet paper roll and your round piece of wood.  Let the paint dry.  Once the paint is dry, slightly push down on your roll and use you scissors to cut loops that are 1/4 of an inch.

{Step 2}: Place glue on the back of your mirror and glue it to the front of your round piece of wood.

{Step 3}: Grab 5 of your cut roll pieces and your glue gun. Glue the ends of 4 of your rolls together.  Take your 5th roll and put glue on the bottom side.  Then, glue this in the center of the 4 rolls you glued.

{Step 4}: Put glue on the bottom of your rolls and glue the 5 piece structure you made to the edge of your mirror.

{Step 5}: Continue gluing your rolls around your mirror…

{Step 6}: …making sure they are flush against one another.

{Step 7}: Once all of your 5 piece rolls have been glued, take a single roll piece and glue it in-between two of your 5 piece rolls. Do this all the way around your mirror.

{Step 8}: Next, take 1 piece of roll and glue it to the 1 piece roll you just glued and one of the pieces from your 5 piece roll.  Continue doing this until you have gown all the way around your mirror, finishing the pattern.

{Step 9}: Turn your mirror over.  Grab your twine and tie a knot at the end of it.  Take your twine and place it towards the top of your mirror with the loop at the top. Take your tack and push it through the knot on your twine and your wood.

{Step 10}: Hang and enjoy!

meghan quinonesComment
How to Wrap Flowers in Paper

If you are always scrambling at the last-minute to find a housewarming gift, I have a super simple project for you.

Housewarming gifts are sometimes hard to come up.  Me, being who I am, I am always trying to come up with something unique as a housewarming gift. Even though unique is nice, you really can not go wrong with a fresh, fragrant, bouquet of flowers. Fresh flowers can bring life to a room.  What better way to warm up a room in a friend’s house than with fresh flowers.

So, instead of gifting your flowers in the plastic wrapper they come, why not wrap them in a custom flower wrap?!? I knew I would be able to come up with a CIY project.  The best part of this project is I used a Trader’s Joe’s Bag I already had on hand!  Can you sense my excitement?!?

Supplies:

  • Trader Joe’s Bag

  • Paint

  • Paint Brush

  • Scissors

  • Twine

  • Flowers

{Step 1}: Cut open your TJ bag.

{Step 2}: Cut the seam that is to the right of the bottom of your bag.

{Step 3}: Paint “Home” on your bag.  Let your paint dry.

{Step 4}: Wrap your twine around your flowers, securing them together.

{Step 5}: Lay your flowers at angle on your paper.  Fold up the corner of your paper over your flowers.

{Step 6}: Fold the left side of the paper over.

{Step 7}: Fold the right side of your paper over.

{Step 8}: Tie your twine around your paper.

meghan quinonesComment
How to Build a Terrarium

I remember one summer (way back when) my grandpa watched my brother and I a handful of times.  I loved this time spent at my grandparents’ house.  My grandpa was great at finding crafts, projects, anything to entertain us.

Some of the things we did when under my grandpa’s watchful eye were: shoot guns in his basement, search for hedge apple trees along country roads so we could make a bow for shooting, play bar (this included us sitting at his bar, pretending to drink out of our steins full of pop. My grandpa was the mayor, my brother was a cop, and I was the sheriff).   So, you may be thinking these don’t sound like things kids should be doing.  Trust me, there were many lessons learned during these adventures.

  • Gun shooting – if you accidentally shoot a can of pop that is full and not part of target practice – it will explode.

  • Hedge apple trees are what Indian’s used to make their bows back in the day.

  • Playing bar? Well, this provided many lessons. How to keep up with the boys, how to handle yourself while at a bar, oh, and that’s where I learned about the birds and the bees (This story is a bit too long to explain :D).

So, you maybe thinking what on Earth does this have to do with a terrarium?!?!? I’m getting there…

One of the other projects we made were terrariums.  We made our terrariums out of old Sprite bottles.  We removed the base of the bottle, cut off the top, and used the bottom as the base.  My brother and I got to customize our little terrariums.  I added a wood house, a piece of plastic to act as a stream, and piece of wood for a bridge.  We went outside gathered dirt and moss from under a tree.  Our terrariums were awesome! I learned that the moisture that collected at the top of my container from being in the sun would “rain” on my little house, watering my moss.  See, I told you we would get there.

Now, the terrarium I made is it a bit more grown-up, but you could definitely add little trinkets and such to your terrarium.

Supplies:

– Butter Dish 

– Dirt

– Charcoal (I used two bricks)

– Pebbles (I used kitty litter because I had it on hand)

– Plants (I used little succulents)

Fill your jar with some pebbles (or kitty litter). Then, layer in some crushed charcoal. Next, pour in some dirt.  Finish by planting your plant of choice!

meghan quinonesComment
How to Paint a Mug

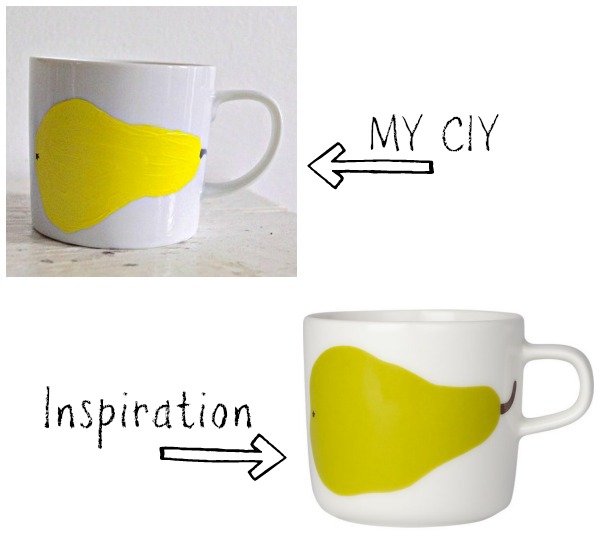
So, I decided the pear mug would be my inspiration.  I figured it was really just a big blob, so painting it free hand wouldn’t be all that difficult.

I actually bought my mug from Crate and Barrel, but since it was not painted by a designer, it was only $3.95!  Throw in some paint for another $2.oo and you have your own version of the Marimekko Paaryna White and Green Cup mug for less than $6.oo!

Supplies:

– Mug (I bought mine from Crate and Barrel)

– Martha Stewart Muti-Surface Satin Paint

– Paint Brush

– Permanent Marker

{Step 1:} Paint the base of your pear on your mug.  It does not have to be perfect as it is basically a big blob. Let your paint dry.  Repeat this until you have nice coverage on your mug.

{Step 2}: Once your paint is dry, grab your permanent marker and draw in your stem.  Put a little star at the bottom of your pear.

 Go get your coffee!


meghan quinonesComment
How to Mable a Tray Using Acrylic Paint

So, um, I made my way to the dollar store one again (I heart the dollar store!).  This time I was on the hunt for a tray.  Well, finding an actual tray was a bit of a challenge.   Thinking outside of the box, I figured a cookie sheet could work perfectly as a tray.  Thank you Dollar Tree!  Check out my cookie sheet turned tray!

Supplies:

– Cookie sheet (I bought mine from Dollar Tree)

– Spray paint ( I used my Krylon Fusion – Ivy Leaf spray paint from my pots)

– 3 colors of acrylic paint (I used Craft Essentials in Orange Spice, Apple Tart, and White)

– Tarp

– Modge Podge

– Paint brush

{Last photo on the very bottom-West Elm, Leah Durner Trays}

{Step 1}:  Grab your tarp, tray, and spray paint.  Spray your tray covering it with your spray paint.  Let it dry.

{Step 2}:  Grab all of your acrylic paints.  Take each of your colors and start randomly squirting paint all over your tray.

{Step 3}:  Hold your tray up so the bottom is parallel to the ground.  Let the paint drip down allowing your paint to mix together.  You will get a swirl effect.

{Step 4}: Now, turn your tray so the handles are now parallel to the ground.  Once again, let your paint run down so the colors mix again.  Repeat steps  3 and 4 until you get your desired coverage.  Let the paint dry.  This can take more than 24 hours given all of the paint.

{Step 5}: Test your paint to make sure it is dry.  If it is, grab your paint brush and Modge Podge.

{Step 6}:  Cover your entire tray with Modge Podge.  Once covered, let it dry.


meghan quinonesComment
Easy DIY Gem Bracelet

When Mike and I were in Thailand for our honeymoon we went to the largest weekend market.  This market had everything, I mean EVERYTHING!  From puppies in tutus to fresh fish, and any kind of hardwood item you could ever need!  One of the best finds at the market was the bead section!

Being quite obsessed with beads and finding the bead section of the market, I felt like a kid in a candy store!  I just kept walking up and down all of the long stands of beads feeling all of them and wanting to buy every last strand.  I only allowed myself to buy 2 strands of beads because If I had allowed myself more time, and more strands, I would have spent the entire day in the bead section of the market!  One of the strands I bought was a lovely milky-blue glass bead.  I thought one of theses beads would be a perfect match for my  gemstone bracelet.  Woo Hoo!!!

Supplies:

– Medium size chain (I used gold chain)

– Large bead (mine was about an inch and a quarter wide)

– 2 small round beads (I used 2 gold beads I already had)

– 1 jump ring

– Clasp

– Jewelry wire

– Jewelry making tools

– A bracelet that is a length you like

{Step 1}:  Take your jewelry wire and slide it through one of your small beads, followed by your large bead, and then your second small bead.  Push your wire through so you have about a half-inch extra.  Use your cutting tool to cut your wire.

{Step 2}:  Cut your wire down (about a quarter of an inch).  Take your round nose pliers to curl your wire under making a loop.

{Step 3}:  Repeat step 2 to the other end of your bead.

{Step 4}:  Grab your bracelet and lay it down.  Put your bead under your bracelet and in the center.  Use this as a guide to see how long you need to cut your chain.  Start at one end of your bracelet and measure out how long you want your chain.  Use your pliers to open the last chain to “cut” it.  Repeat this step on the other side of your bracelet.

{Step 5}:  Take your open chain and put it through the loop at the end of your bead and use your pliers to close your chain.  Repeat this step on the other side of your bead.

{Step 6}:  Grab your jump ring and your clasp.  Use your pliers to open your jump ring.  Slide your jump ring through the last chain on your bracelet and then run it through the bottom loop on your clasp.  Use your pliers to close your jump ring

Enjoy!

meghan quinonesComment