How to Make a Wooden Bracelet


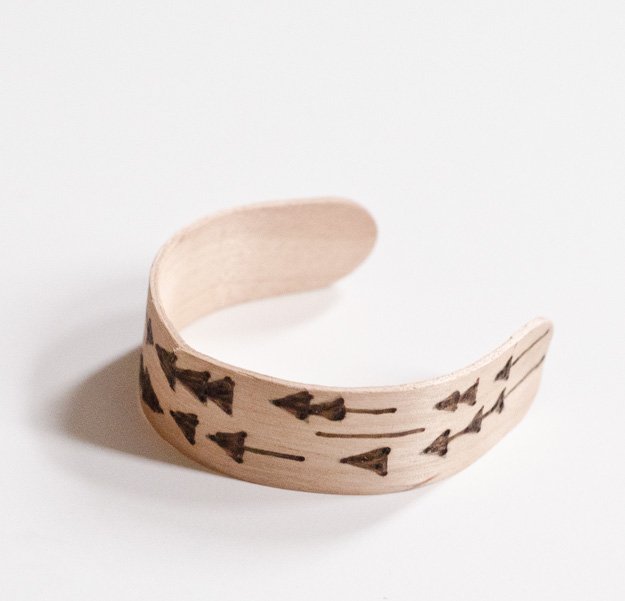
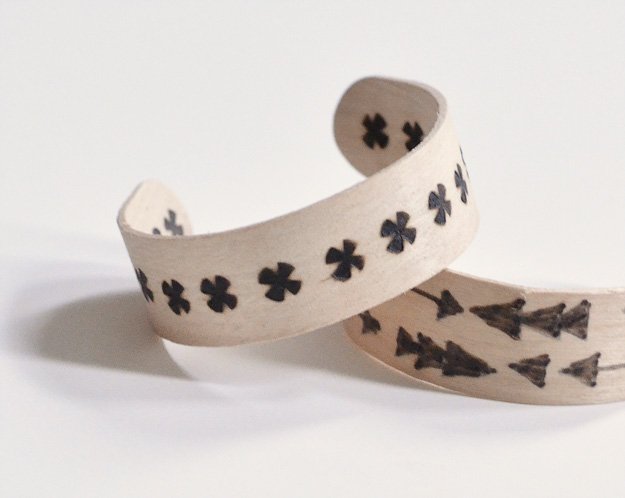
Remember the popsicle sticks I bought from the Dollar Store? Well, when I looked at them I got a bright idea. I decided to turn them into bracelets, not just boring wood bracelets, but wood burned bracelets!
I bought a wood burner about a month ago after using one for a work project. I had not used a wood burner in YEARS. I am now obsessed with my wood burner! No piece of wood is safe. I want to burn designs into all of the wood I see! I took my obsession even further and bought these cool metal attachments. I took one look at them and knew they would fit my wood burner! I used one of the designs to create one of my bracelets (the one that looks like “x’s”).
A special shout out to Liz and all of her 6th grade friends: Thanks for following my blog! This is a project all of you can do! Get together and make custom bracelets for all of your friends. :)
***UPDATE***
Carolyn shared this technique with me… She put her sticks inside of an Arm & Hammer detergent cap. She said they are the perfect size for your bracelets! Once the sticks are placed inside of the cap, she put clips on each open end and let them dry over night. Thanks for sharing this tip, Carolyn! – Meghan
Supplies:
– Popsicle Sticks (From the Dollar Store)
– Wood Burner
– Pencil
– Round Object (I used an air freshener can)
– Rubber Bands
– Pot
{Step 1}: Draw your design on your popsicle sticks with your pencil . Then go over your designs with your wood burner.
{Step 2}: Fill a pot with water and boil. Once your water is boiling, drop in your popsicle sticks. I let my sticks boil for about 15 minutes.
{Step 3}: Remove your stick one-at-a-time and start to lightly bend it, creating a curve. Then, wrap the stick around the air freshener and secure it with your rubber band. Let your sticks dry. I let my sticks dry over night.
{Step 5}: Unwrap your rubber bands and you have a wood burned wooden bracelet!