How to Create a Faux Clay Vase


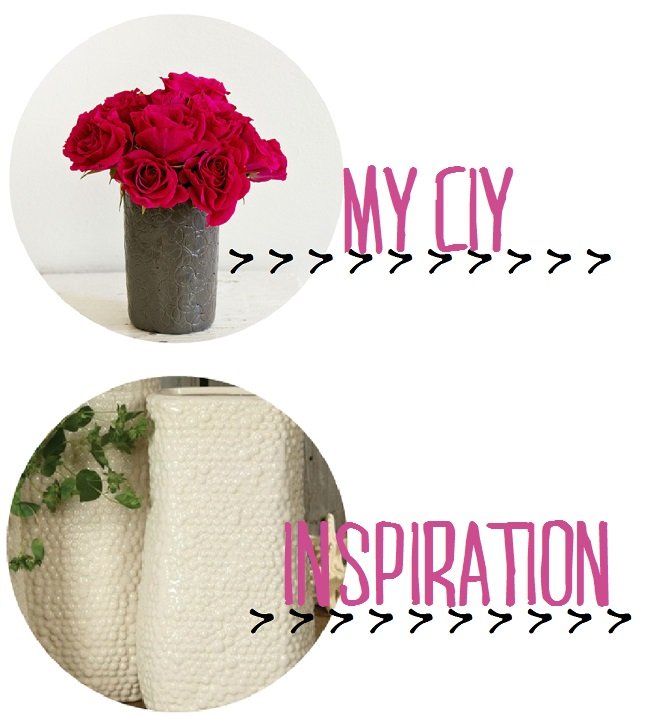
As I thought about how to tackle this textured clay vase project, I knew I wanted to find some sort of easy workaround. Well, mission accomplished! I was able to transform my glass vase into a clay one!
I had either an old shot glass or a juice glass in my cupboard. This glass had been used in the past as a vase to hold my small flower buds (sorry, Mike if this used to be an accessory in your bar!). As I tried to think of a way to create a clay vase that could hold water and would have a sturdy form, a light bulb went off. Wrap some stinkin’ clay around the actually vase!
I was not sure how well this would work. I started to work with my clay a bit, wrapping it around my vase. Viola! A glass vase covered in clay, that actually looks like it’s a clay vase. Boom!
Supplies:
– Glass Vase or Container
– Sculpey Clay (I decided to go with gray)
– Clay Cutter (mine came in a pack with about 7 or 8 other shapes)
– Rolling Pin
– Knife
– Mod Podge
– Paint Brush
{Step 1: Roll out your clay so it is a bit longer than the length of your vase. Then, roll your clay out so you have enough to wrap around your entire vase.
{Step 2}: Start wrapping your clay around your vase. As you roll your clay around your vase, use your knife to trim the clay down around the top and bottom of your vase.
{Step 3}: Once you have wrapped the clay around your entire vase, cut off the excess clay. Use your fingers to smooth out the seam on your vase where the two clay ends meet.
{Step 4}: Take your fingers and smooth out the clay around the top and bottom of your vase.
{Step 5}: Grab your circle clay cutter and begin making impressions all over your vase (NOTE: do not push too hard, you do not want to actually cut out a piece of clay).
{Step 6}: I went back and made more circle impressions, overlapping all of my circles. Once you finish with your pattern, bake your clay according to the package it came in. Let your clay cool once it is done baking.
{Step 7}: Take your Mod Podge and cover your vase. Let the glue dry. This will give your vase a finished look. You are finished. Enjoy!
{Photo Credit: Bottom:Wayfair}