Untitled-3.jpg

Blog

Posts tagged earrings
DIY Patina Looking Earrings Using Acrylic Paint

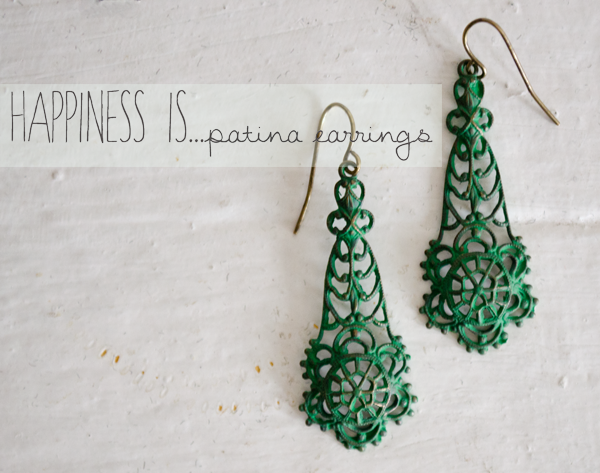
Yay for earrings that have the look of patina, but not the smell (thanks, Shelby for pointing that out)!  These were super fun (and easy) to make.  I may have to “weather” everything brass lying around my apartment! 

patina earrings 1.png

Supplies: 

– Brass filigree drops (I bought mine at Joann’s) 

– 2 brass earwires 

– Green acrylic paint (I bought mine at Joann’s – color is “Traffic Light”) 

– Paint brush 

– Jeweler’s pliers/pliers 

– Paper cup 

– Paper plate (to paint on) 

(Step 1}: Pour 3 drops of paint into your cup.  Then pour 3 drops of water into your cup.  Mix the paint and water together.  You want your pant to be watered down. 

{Step 2}: Paint over both of your earrings completely covering them.  Let your earrings dry. 

{Step 3}: Grab your earwires and pliers.  Take your pliers and open the loop at the bottom of yourearwires. 

{Step 4}: Take the open loop of your earwire and put it through the top loop of your earring drop going from the unpainted side through to the painted side.  Then, take your pliers to close the loop of yourearwire. 

DIY Patina Looking Earrings Using Acrylic Paint

 Finished! 

{Photo credit: Top – People StyleWatch Magazine 

DIY Glitter Stud Earrings
glitter earring 2.jpg

I decided to ease in to sparkle and glitter.  I decided to make glitter earrings. 

Supplies: 

·         2 Buttons (preferably with a divot to hold the glitter) 

·         2 earring posts 

·         Mod Podge 

·         Pliers 

·         Super glue 

·         Paint brush (or Q-tip) 

Step 1: Cut the back off of your buttons.  I used pliers to do this.  

Step 2: Cut the back off of your other button.  

TIP: If the back of your button is not smooth, use a lighter to melt the button (if it is plastic) and then use your pliers to cut the excess off. 

Step 3: Take your paint brush (or Q-tip) dip it in your Mod Podge and fill the inside of your button with Mod Podge. 

Step 4: Fill your button with glitter. 

Step 5: Fill it all of the way to the top! Let the glue dry. 

TIP: I would wait 2 hours or so to make sure the glue is completely dry. 

Step 6:  Once the glue has dried, shake off the excess glitter. 

Step 7: Put super glue on the back of your earring post and glue to the back of the buttons. I would wait an hour or so to make sure the super glue is completely dry. 

Enjoy your new glitter earrings! 

glitter earring1.jpg